


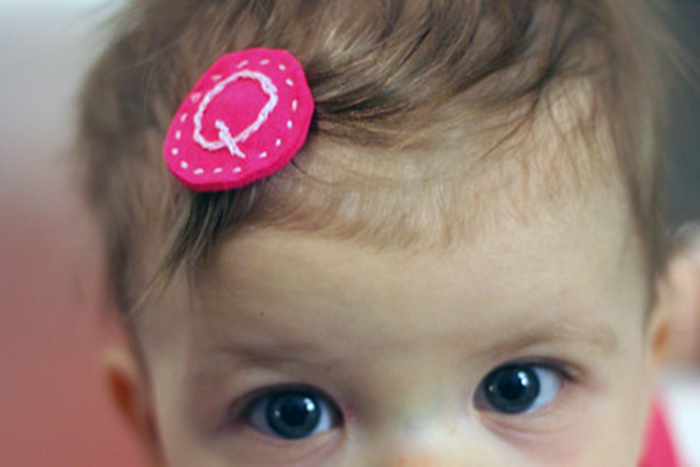
I’m back with more felt hair clippies! This time it’s a monogrammed hair clip for your stitching pleasure. Quick and easy and a wonderfully personal gift for a baby or little girl. Get the DIY after the jump.
First, stop by here to review the basics on hair clip supplies if you need to.
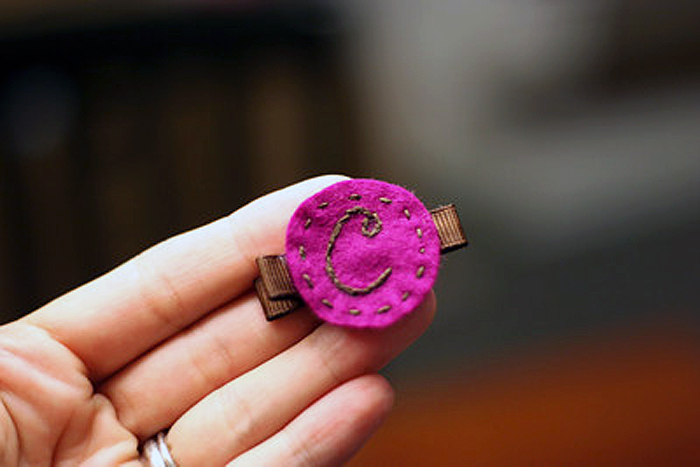
I made two, one with each style clip. I suggest only using the small snap clip (shown in the photo below) if your baby has fine hair. For older girls with more hair you will want to use an alligator clip for this style.

The directions for both styles are mostly the same at the start. I will make variation notes for each style.
1. Trace a circle on to your felt. A spool of thread is the perfect size for this.
• Snap Clip: Make sure your circle is bigger than your clip, it will be sewn inside eventually.


2. Double up your felt and cut out your circle shape (total of 2 circles).
Alligator Clip: You only need 1 circle but your finished product will be a bit nicer with 2.

3. With light pencil or disappearing ink, draw your letter centered on 1 circle. Remember that you will want to make it small enough to add a stitch around the outside later. I’ve tried various methods of transfer to trace a letter onto the felt but have found it’s easiest just to freehand.

4.Using regular thread or embroidery thread, stitch your letter onto your circle using a Back Stitch.
I’ve found that 3 strands of embroidery thread is quite perfect. The “Q” uses 6, the “C” uses 3.

If you are using an Alligator clip, pick up at step 7 below and then click here for directions to finish your clip.
5. Snip a small hole in the back of your 2nd circle, just big enough for the back of your snap clip to fit through. Make sure you think about your circles matching up and also consider which side of the head the clip will be worn on. If it’s a gift, your best bet is the right side of the head since most moms are right handed.


6. Sew your clip in place. If you want it to look more polished, use thread that matches your felt. If only you will see it, it doesn’t matter.

7. Position your top circle (the one with the initial) on top and stitch all the way around the edge using small even stitches and tie off. You can use a small dab of glue to hold your ends in place so they don’t peek out.

Ta da!

Here’s a J!

So cute! Where's the S?
Oh! That is SO SO SO cute!
can i tell you for a second, before i remembered sweet juliette, i thought maybe, just maybe, that J was for me. HA
These are so cute! I am about to have a little girl and will make some for her.
One thing I have found that works for tracing letters on felt is to type a letter on your computer, get it the right size and font that you want to fit in the circle, and then hold the felt up to it and trace. The light from the screen makes it so you can see the black letter beneath. I have added circles like these to fleece scarves I have made for some little girls and baby blankets that I bought at target that I wanted to personalize.
Great suggestion Jocelyn! Another great way to transfer a pattern for embroidery is to use carbon paper but the sun is alot cheaper. : ) Love it!
Thanks so much for posting this Jaci!!
Hi,
I'm a friend of Nico's and fell in love with Juliette's monogram hair clip. Thanks so much for posting this. I'm off to get some felt and clips. Love your site!
These are so cute! I can't wait to make these. Thanks so much for sharing this tutorial with us!
That is so cute! Thanks tons, I'll be linking.
i cant wait to do some of this cute clips to give!!!thanka a lot!!!!!!(*v*)
Love this! I'll have to pick a fun font for my "E"!
Think I just figured out how I'm going to "label" my identical twins when they head off to preschool!!!
I LOVE these hair clips!! I have a question as I am new to the whole Sewing DIY projects! Sorry if it is a stupid question! How do you get the letters to look like the thread is braided? Is it actually braided when you hand stitch it on?
Hi mallorie- when you do your backstitching (see link in DIY), bring the needle up in the middle of the threads of your previous stitch. Splitting the stitch like that will give it that braided effect.
I cant wait! these will be perfect for my new niece!
Hi! For the alligator clip, what am I doing with the second circle? Thanks so much … I love all of these hair clips!
Hi Erin-You can either skip the second circle or sew two layers together for a more substantial felt circle.
Thank you so much!
[…] up we have an adorable DIY Monogrammed Hair Clip modeled by a teeny tiny baby Quinn. Check […]