


Potholders are superfun scrap busting projects, so customizable and great for a bit of fabric you want to see every day but don’t want to like, wear. 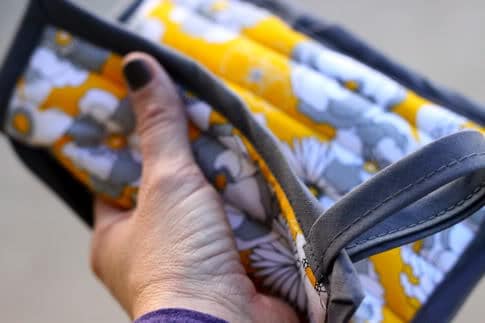
I made this one with a little pocket for your hand, just because I prefer being able to grab a hot pan handle that way. Umm, I have old lady hands. Don’t look.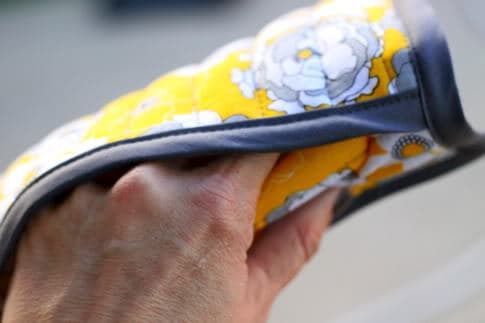
I said don’t look!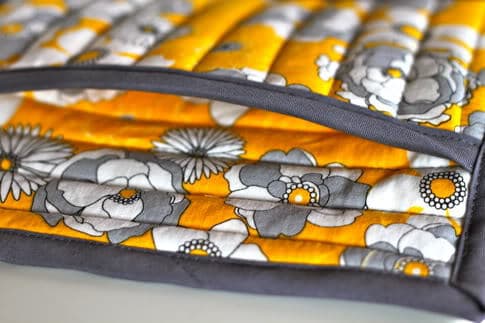
Sigh. Learn How to Make A Potholder after the jump…
Make one yourself and enter it into the SEWING MACHINE DOUBLE DOWN CONTEST for your chance to win a new Brother Sewing Machine!
Prudent Baby Pocket Potholder
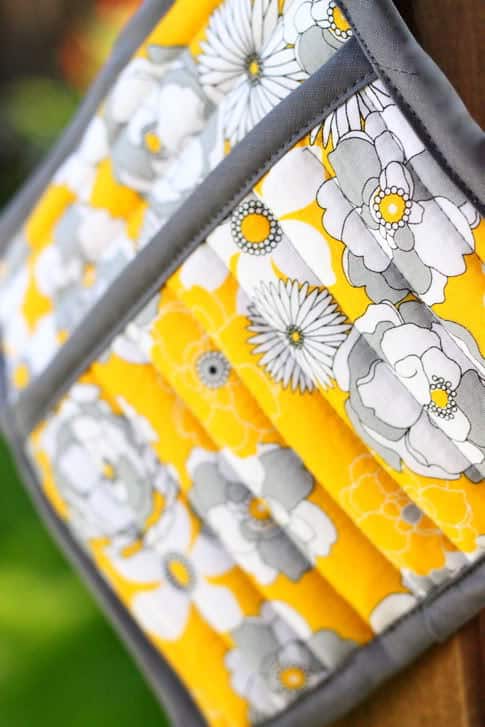
Isn’t this fabric soooo pretty? It’s Robert Kaufman Night and Day 3 Cluster Floral in Yellow from Fabricworm.
You’ll need some double fold bias tape. I made some in gray using our How To Make Bias Tape tute as well as Jacinda’s Bias Tape Eureka trick.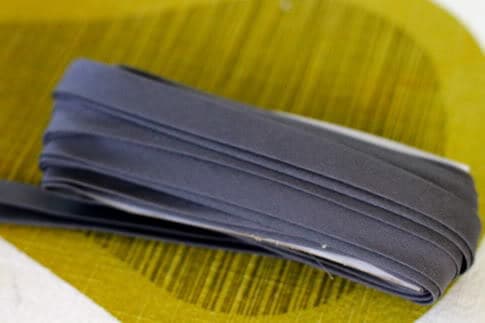
Cut your fabric & batting. You want to use all cotton batting (polyester can melt) or you can buy insul-brite batting![]() which is great for protecting you from heat. You’ll need two 8″ squares of fabric and batting (you can use one layer of thicker batting, but i used two layers of low-loft), and two 5″X8″ rectangles of fabric and batting.
which is great for protecting you from heat. You’ll need two 8″ squares of fabric and batting (you can use one layer of thicker batting, but i used two layers of low-loft), and two 5″X8″ rectangles of fabric and batting.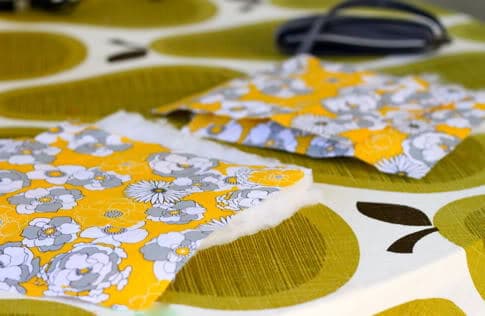
Lay one 8″ square of fabric wrong side up and place your batting on top.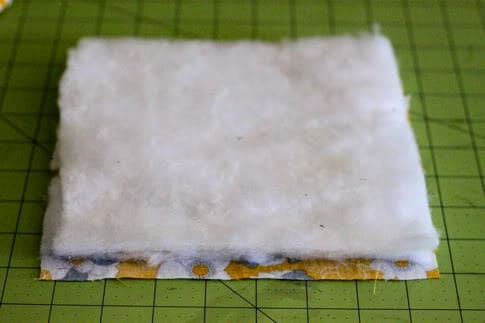
Lay your other 8″ square of fabric right side up on top.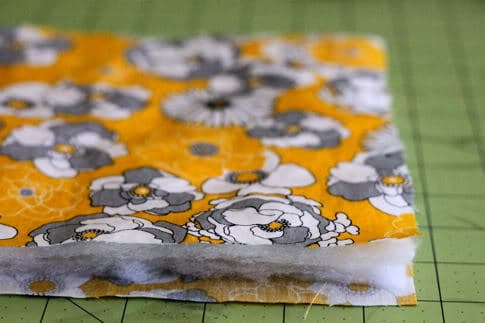
Quilt as you please, which just means sew the layers together. I just did vertical lines. I used my walking foot![]() , but it’s not a requirement for a project this small, your regular foot will be fine.
, but it’s not a requirement for a project this small, your regular foot will be fine.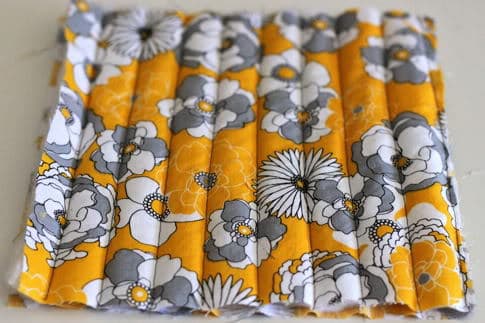
Make the same sandwich with your rectangles of fabric and batting.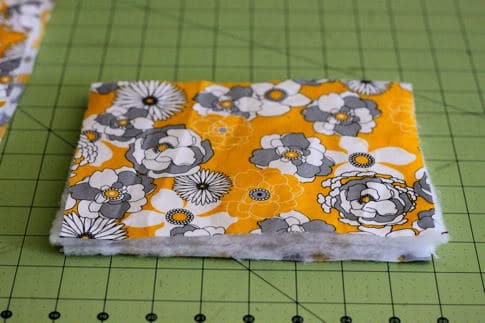
Quilt them together as well.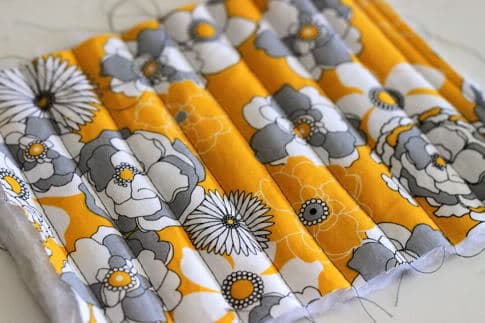
Cut an 8″ piece of double fold bias tape and fold it over one 8″ side of the rectangle: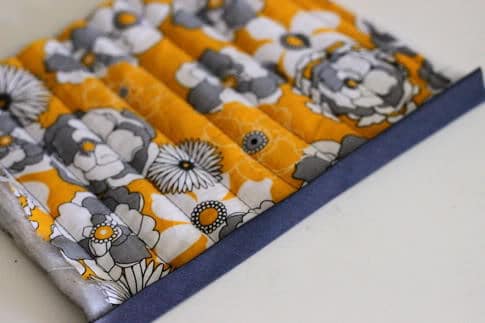
Sew in place: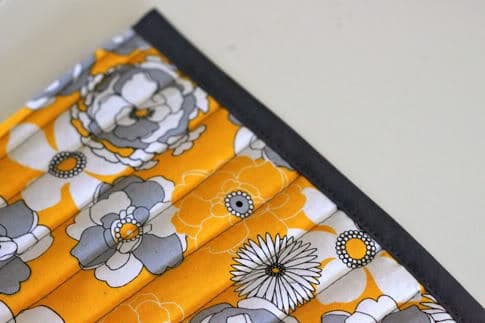
Now choose which side of your pieces you want to show. Lay your rectangle piece with the unfinished 8″ edge aligned with one edge of the square. Baste in place on the three unfinished sides: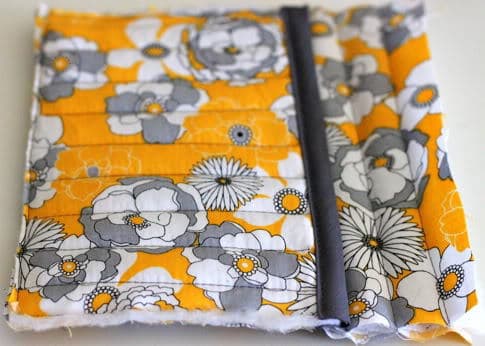
Attach your bias tape, for step-by-step details on how visit our How To Sew With Bias Tape tutorial. I did single-step binding because I am lazy and prone to rushing, it would probably be best to do two-step binding.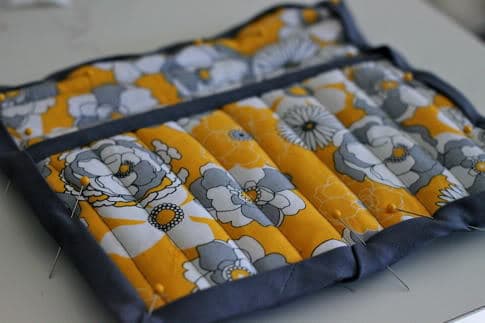
Sew a 6″ piece of double fold bias tape together at the edge. On one corner opposite the pocket, insert one end of the 6″ strip under the bias tape: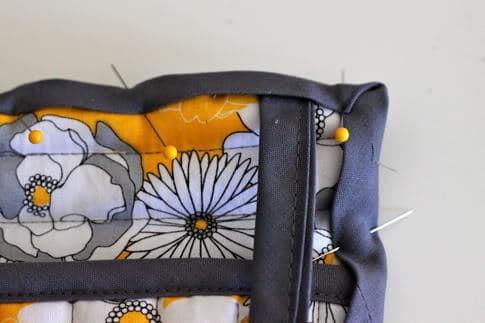
Fold it up and pinch to hold it in place: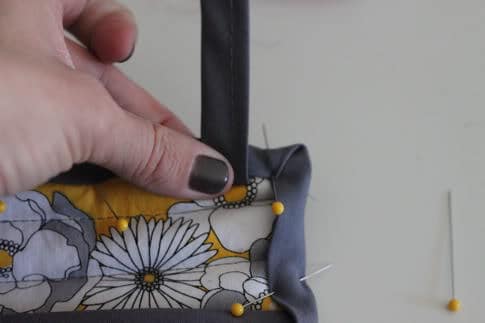
Flip the potholder over and insert the other end of the 6″ strip under the other side of the bias tape: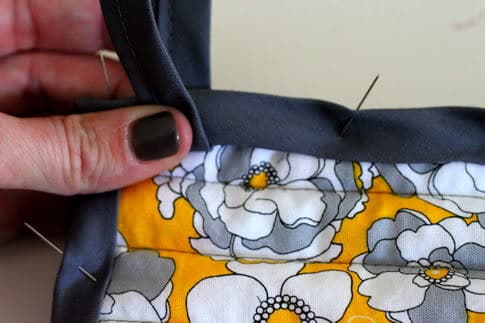
Pin in place: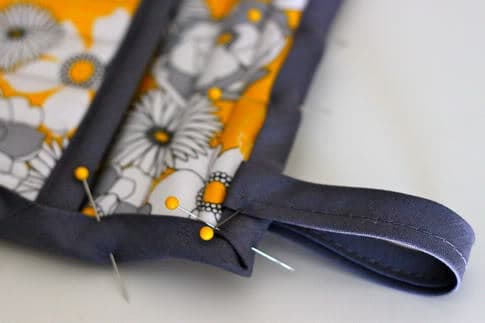
Sew the bias tape in place at the edge all the way around, securing your loop in the process: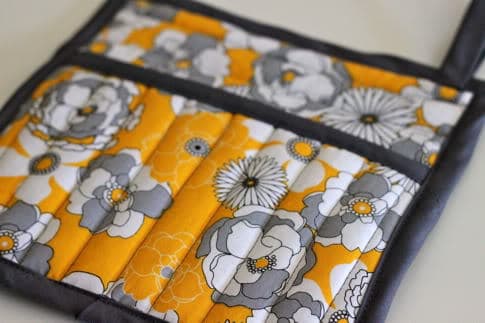
Done!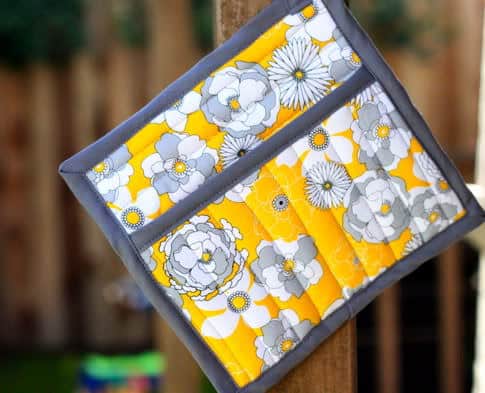
WONDERFUL tutorial!! Love the fabric too!
kisses
Heather from WhipperBerry
Thank you very much. I will make a few for our women,s homeless shelter.
I love "great for a bit of fabric you want to see every day but don't want to like, wear." (Although, I'd want to like, wear that beautiful yellow fabric!)
I just got a bias tape maker for Christmas and this is the perfect project to put it to work. It's also good timing – I'm tired of making gifts for others, I want to make something for ME ME ME!
You don't have old lady hands and your nails look great!
Awesome!! I love that fabric you used! I linked to your tutorial over at Craft Gossip Sewing:
http://sewing.craftgossip.com/tutorial-simple-square-potholder-with-pocket/2010/12/29/
–Anne
Love the potholders. I haven't been able to find a tutorial on attaching bias tape. Is there any tricks I should know?
jan – see the bias tape step above and this post: How to Sew With Bias Tape that explains exactly how to do it. XO
Thank you so much Jaime. I knew it had to be here some where.
Thank you so much. I added this pattern linking back to your site at the new online sewing community: http://www.mysewingcircle.com
Yay! I'm excited to make pot holders! (Never thought I'd be saying that at 26 years old!) I found some great M&Ms; printed fabric that I've been holding onto to make something for my mom (she collects everything M&Ms;) and now I know what to make! Potholders and a matching fat quarter apron— I *puffy heart* you Prudent Baby!
Haha… I almost died laughing at the "old lady hands" I really have old lady hands at 28 and my nails only look like yours while they are drying and then I inevitably mess them up and within a day start chipping. Seriously, I love the look of quilting in rows! I always think I need to outline the pattern but you showed me rows! And I love them! (Yes, I do live under a rock or maybe it is just motherhood.)
Tamara: two words: gel polish. just tried it and now i'm a believer – it lasts a month!
Quick question! Love the tutorial first of all. My sister has a birthday coming up and is a cooking fanatic! So being the good sister that I am, I am going to make her a cooking themed gift set, complete with apron, dish towels and of course pot holders. I am however wondering, how expensive do you believe these pot holders are to make? I was wondering if it would be less expensive to buy dollar store pot holders and cover them with my fabulous fabric, or buy the appropriate batting (please excuse me if I spelled anything incorrectly!)?
Is there a trick for keeping the layers from shifting while you're quilting them? Tried to make this tonight and ended up having to trim all the way around both the square and the rectangle.
SqueekersMcgee – the only surefire way is a walking foot. once u get one you'll become obsessed.
I also had trouble with the fabric shifting because I don't have a walking foot. It's on my birthday list though! If you use insul-brite, are two layers needed? I went ahead and used two layers and faced them both toward the fabric, that way the potholder can be used multiple ways but wasn't sure if it was necessary. I blogged about my experience here (http://sewingnovice.com/2011/02/17/potholder-and-oven-mitt/) Thanks for yet another fun tutorial!
Great!I made it. I shared your tutorial in my blog and link it back to you http://krasart.com/?p=335
I <3 the tutorial. It was so simple. I actually copied this design: http://www.crateandbarrel.com/kitchen-and-food/aprons-potholders/crate–barrel-spring-green-potholder/s480684
I used a Moda Dusty Jade fabric and an old towel that had well had it (to many stains and holes to keep). Using this tutorial it was SUPER SIMPLE!! I love the finished results. Especially since I've had been in desperate need of new pot holders. Mine old ones are burnt, stained, frayed, and well falling apart.
To those that have a problem with the fabric staying in place. You might want to try baste the fabric (pin it together with safety pins then stop at the top piece of fabric. Place the fabric pieces under your foot, put the foot down, and then put the needle in the down position. Then I started to slowly send the piece through my machine no problems at all. I do have a walking foot but chose not to use it for such a small project.
I do have a bias question when making your own what color thread do you use? White, or the same as the fabric?
Cheers & Good Luck
Thank you for the great tutorial. I used it to make a Christmas in July gift for a swap partner. It turned out great, but I think I would have been happier if I had used the two step method. I added a girly ruffle down the front of mine, too :). Thanks again!!
http://www.bearrabbitbear.com/2012/07/ruffle-pot-holder.html
[…] I made this super cuter scrappy potholder using Prudent Baby’s Pretty Potholders tutorial. […]
[…] colors but decided I wanted to find a more intricate DIY for some. I ended up finding a great one HERE on a blog called Prudent Baby and used the tutorial to make these the two potholders shown above. […]
We are intrigued along with thinking about what you will be talking about right here.
Can you use fleece instead of batting? I have some left over from another project & don’t have any batting right now so was just wondering if that was an option…
omg I love this! A sewing tutorial so simply laid out I can actually understand what needs to be done 🙂 Thank you! <3
Now. About your hands. They are lovely. Though it sounds like you are perhaps a bit unhappy with the fine lines. So! Get some Raw, Unfiltered, Organic (if possible) Shea Butter.
tl;dr – Shea is crazy awesome for the skin and can be used solid, liquid or whipped!
Shea has minerals and nutrients that help rebuild collagen (the stuff that makes our skin smooth) and is insanely moisturizing without being greasy like lotion. You can either use it straight out of the bag by taking tiny (seriously, tiny) pinches and letting your body heat melt it, and rub it in. Or, you can very slowly and gently melt it down in a double boiler (water should be hot, not simmering!) then pour it into a large bowl, let it cool until it's getting thick again (don't use the freezer, but the fridge is okay, just check frequently) then beat it with an electric beater until it is smooth and creamy. You then have Shea Body Butter. It's heaven for your skin. Use all over – hands, neck, arms, feet, even face and (carefully) under and around the eyes.
I've been using home-made Shea body butter every night for about six months now, and my "old lady" skin looks easily 10 years younger. It's much smoother, way softer, and has that youthful shiny-glow I haven't seen in years 🙂
There is one caveat though – some people don't like the smell. I don't mind it, but I put it on at night because the scent has staying power and can clash with perfume and body spray. If you get Shea that's from the western part of Africa, it smells very smoky and nutty. Sort of like Lapsang-Souchong tea. However, western Shea has a higher melting point, so it generally stays firm at room temperature. There is a type of Shea from the Nile region of Africa, some call it "Shea Nilotica". It has a very delicate scent, more nutty than smokey, but it is softer and depending how hot it gets where you live it can melt a bit. It can also show up rather melted during shipping. If that happens, or if the raw Shea ever feels gritty, it is still perfectly fine; the grittiness happens when Shea melts and solidifies without being stirred. Melt it down gently, stir it gently as it cools, and it'll be a perfect solid again (or, you know, whip it!). You can mix the two and you get something that is less smoky and less prone to melting. What ever you do with it, it doesn't matter where it's from or whether it's whipped, solid or liquid, it's absolutely magical for the skin!
(shuffles off a bit embarrassed by rant length, but hey, I <3 Shea!)
[…] Pretty Potholders – Prudent Baby […]
[…] This potholder can be used as an oven mitt too. Pattern from Prudent Baby. […]
I know this tutorial is a few years old, but thank you! I was looking for an easy tutorial and this was it! Mine turned out great and your bias tape tutorial helped me so much!
[…] edges and sewed on the line, and then cut out the mitt shape 1/4″ outside the lines) and this one to add loops to the potholders, which were quilted 8″ x 8″ squares with one layer of […]
I have made several of these potholders. I personally prefer a potholder that is 8-10″ in size. Remember – you will lose another 1/4″ (or more) when sewing around – so adjust the pattern to one that works for you. Yes, the walking foot built into your sewing machine or a walking foot attachment is a must! All the layers will shift slightly even though I use plenty of long quilting pins. I also use one layer of Insul-brite and one layer of Warm & Natural for the batting. GREAT POTHOLDERS.
[…] edges and sewed on the line, and then cut out the mitt shape 1/4″ outside the lines) and this one to add loops to the potholders, which were quilted 8″ x 8″ squares with one layer of […]
[…] pack, I made a Ruffle Pot Holder to go along with it! To make this pot holder, I followed {this} tutorial from Prudent Baby. The only addition that I made is the green ruffle running down the […]
[…] Sew pot holders […]
I really like the unique way of attaching the hanging loop to the pot holder. Thanks for the great idea and for sharing. To those people that have trouble with the layers shifting—–that’s what pins are for! I pin everything I sew and my layers never shift and my corners always line up perfectly.