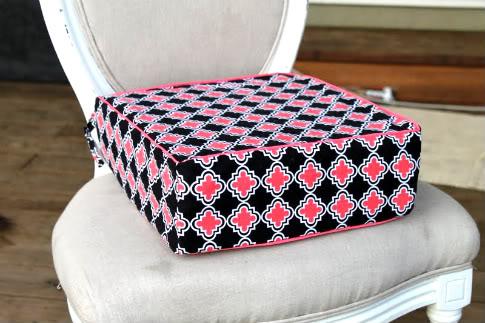
The phone book is a reliable tool for helping “big girls and boys” sit at the table with the grown-ups, but I think this handmade booster seat is way cuter. I hope you make one, if only because I sewed right through my finger making this (through the nail and out the other side – impaled) and I’d hate for that to be in vain. Get the full DIY Booster Seat Pattern and How-to after the jump…
DIY Booster Seat Pattern / Tutorial
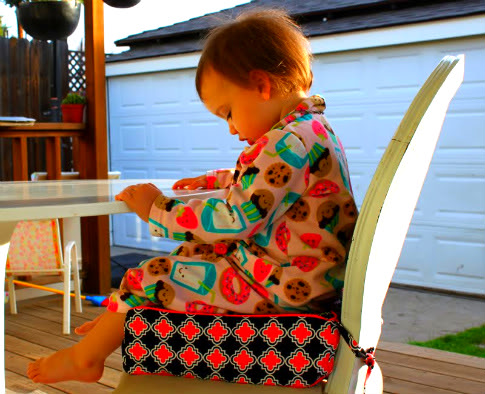
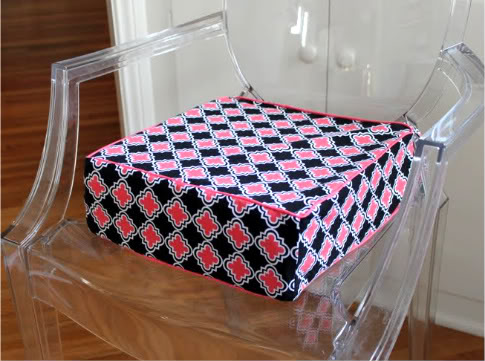
This booster seat how-to uses a foam inner and a removable cover, so you can wash it (and I made it with no zipper just to be easier). The cushion is 12″X 12″ X 4″ which is perfect for my almost-two-year-old. You can scale the size up or down from there, I’ll tell you where.
-First purchase or cut 1 piece of 12″X12″X4″ foam or 2 pieces of 12″x12″X2″ foam (that’s what I used)
Sides: 4 pieces 12.5″ by 4.5″ (or one piece 48.5″ but it’s not possible to get all of these pieces if you only have a yard of fabric) To make the booster seat taller or shorter, increase the width on this/these pieces
Ties: 4 pieces 6″X2″ (or longer or wider if you like)
You’ll also need 2 packages of piping (at least 4 yards), or you can make piping, but I’ll post a tutorial on that later. Or you can skip the piping, but what’s the fun in that? (note: saving your finger could be fun)
-On each of the two bottom pieces, fold over one of the 12.5″ edges 1/4″ and iron, then another 1/4″ and iron, then sew in place. These will be the inside edges of the envelope for removing the cushion.
Set that aside.
-Now to make the ties. Fold each tie in half the long way and iron, then sew:
Loop turn inside out by inserting a safety pin and working it in on itself like so:
Until it turns:
Iron the ties with the seam in the middle of one flat side:
Turn one edge under and iron, turn it under and iron again, then sew in place:
Set your ties aside.
-Now take your top piece and lay it right side up. Pin your piping facing inwards, with the edge aligned to the edge of the fabric:
Where the piping meets, cut it a little longer on one side. On the other side, pull open the piping to reveal the cord:
Cut the cord so your two pieces of piping will meet when you slip the other edge inside:
Then wrap the fabric around like so:
Score the corners, then sew in place with a basting stitch right along the stitches on the piping using your zipper foot.
-Choose which side will be the back of your booster seat. Pin a tie to each corner, wrong side up, with the length of the tie to the inside:
-Now take your four side pieces and pin each one along one side of the top piece, being careful not to pin them into each other:
Turn the piece over so you can see your basting stitches and sew them in place on each side along the basting line. Don’t sew the corners yet.
When you turn it over, it will look like this:
-Fold your piece into a triangle so you can see where the two sides meet up:
Sew the two side edges together:
When you’ve done all four it will look like this:
But your corner will be a little loose like so:
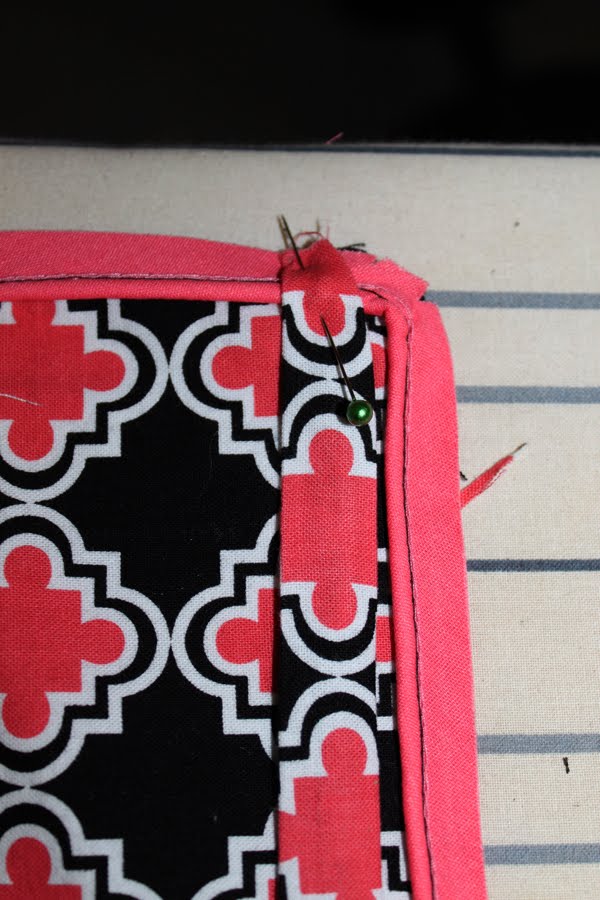
Turn it back around and pin the edges open and finish the corners nice and tight next to the piping:
Iron the inside seams open:
–
Now you’ve got the top and sides assembled. You can trim the edges with pinking shears to prevent fraying or serge:
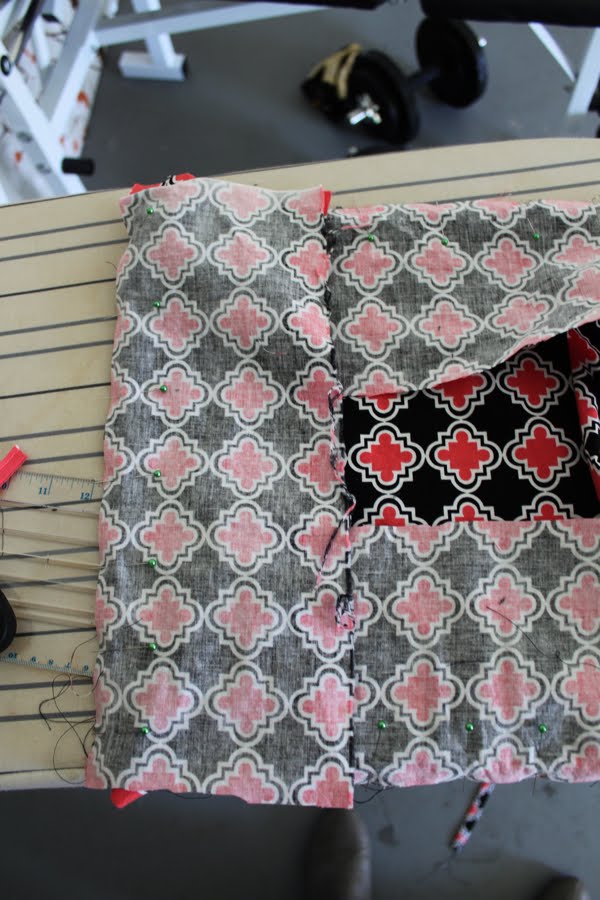
-Now to assemble the bottom of our booster seat. Take your two pieces and lay the bigger one right side up, then lay the smaller one right side up on top of it. Arrange them into a 12.5″ square. Double check to be sure!
Pin your piping all the way around with the piping to the inside and the edges aligned. Repeat the step above to align the ends of the piping and score the corners.
Sew in place using your zipper foot and a basting stitch:
Remember to sew right on the piping stitches:
-Now lay your bottom piece right side up and decide which edge is the back of your booster seat. Take the other two ties, this time facing right side up, and pin them close to the corners:
Take the top of the booster seat, inside out and pin it to the bottom (right sides facing), starting at the corners to make sure they line up, then pinning all the way around. Make sure you have the edges with the ties on the same side:
Now turn your piece over so you can see your basting line and sew together using your zipper foot on top of, or even just inside, the basting line. Take extra care at the corners.
PAUSE IN ACKNOWLEDGEMENT OF THE INCIDENT THAT OCCURRED AT THIS POINT AND IN REMEMBRANCE OF MY PREVIOUSLY UNBLEMISHED FINGER. TAKE NOTE: BE CAREFUL USING YOUR ZIPPER FOOT AND PIPING NOT TO LET YOUR FINGER SLIP AND IMPALE YOURSELF.
Above picture taken moments after impaling. I was so pleased no blood got on my booster seat. But, OMG, it’s still threaded!! It went through the top of my nail, came out the other side, and was still threaded! I was worried my machine couldn’t sew leather…THIS BABY CAN SEW BONE!
But anyway…
-You’re almost done, just trim the edges with pinking shears or serge:
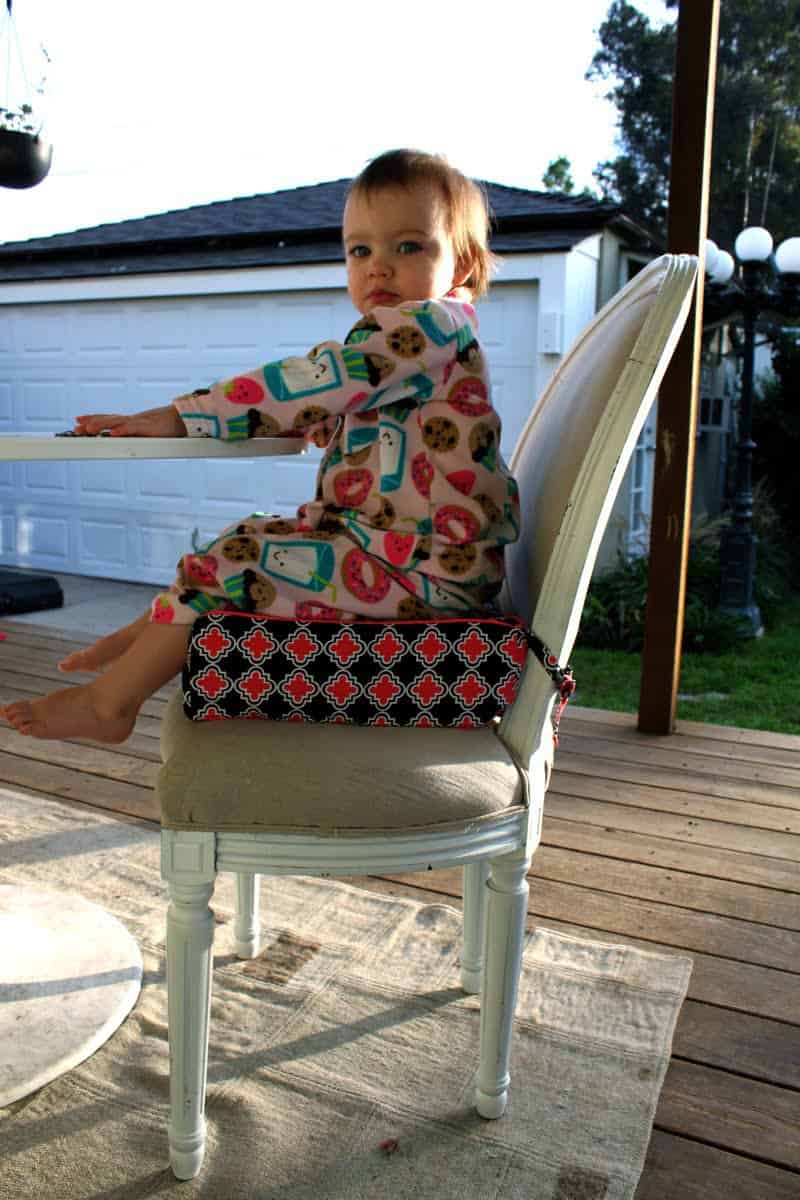
OK, now you’re done. Flip it inside out and stuff the foam in.
That is fantabulous- the best part is that it's easy to remove and throw in the wash. I hate constantly scrubbing dried food off my son's plastic one…yuck.
So cute! But yikes!! I sewed through my finger in my collection development class when I was getting my AA in fashion design. Through the nail and out the TOP of my thumb…yeah kinda at a funky angle. I wasn't lucky enough to still have my machine threaded. My poor dad had to pull the thread out of my finger! Luckily I didn't get any blood on my project either..so be careful when sewing in the lining to a lined blazer!! LOL!
Love this! Fabulous! My "to do" list is getting huge but I'm bumping this one to the top. Thanks for the tutorial! Sorry about your finger. It sounds really painful!
hi! that fabric is great, it came in an aqua blue as well. i'm 99% sure it is a paula prass for michael miller but i bought it at International Silks and Woolens and they don't have an online store 🙁
Just made a similar one. I put some of those plastic craft filler beads in the bottom. I think I might add some ties. I think that will work better. My 5 year old likes the boost without it feeling like a baby's chair.
Awesome project!! My daughter is old enough that she doesn't need a booster seat anymore, but my sweet 93-year-old grandmother could really use one of these!
I love this and I think I am going to try to make it with a slight modification: I plan to do my overlap on the back instead of on the bottom. That way if it gets dirty I can quickly flip it over and get another meal out of it before washing. Who am I trying to kid? I'm just thinking that if I have company drop in I can hide the grubbies by flipping it over real quick. 🙂
I sewed through my finger once – with the sewing machine. And only once! It was so painful I've been very careful since. Thanks for sharing all your great patterns.
Thanks so much! This is a great idea – definitely going to make one for DD. Sorry about your finger too! By the way, what kind of foam did you use and where did you get it?
i used regular upholstery foam and i got it at an upholstery fabric shop, but if you look up "foam" in your yellow pages or online yellow pages you will find local shops that just sell foam!
I LOVE this!! My 7 year old is small for her age and still has to sit in a booster chair sometimes. She's tired of the "baby" chair. I think this would really make her happy. Thanks for sharing it!!
I'm totally making this for me & a few friends! I love that it can match your decor & blend right in! And I sewed through my finger the other day too…not the nail, just next to the nail. It was terribly painful & in the moment I couldn't figure out how to move my needle so that I could get my finger free…it was a mess!
This is awesome! I’ve just covered phone books in duct tape for my kids like parents did for me as a child…. but this is WAY CUTER! Sorry about your finger… I’m guessing it’s healed by now considering this was several years ago. But, just so you know, I sympathized and winced as I read the horrific account of how it happened. 😉
Great tutorial,I have a piece of foam left over from a computer wrapping and a 2 year old who needs a booster.Thanks for the inspiration.To save yourself a step cut the ties into one long strip and cut them out after you have turned them inside out.
Someone essentially help to make significantly articles I would state. This is the very first time I frequented your website page and up to now? I amazed with the analysis you made to create this actual submit incredible. Fantastic task!
Hi, Love the post, but I am not sure if i keep missing the part where u say the seam allowance measurement. From the pictures it looks like a half inch but from the pattern it looks like a quarter.
[…] 11. Colors Scrap Book at Everyday Celebrations 12. Baby Block on Sew Like My Mom 13. Baby Booster at Prudent Baby 14. Wipe Container Toy Upcycle at A Spotted Pony 15. Colors Book at My Everyday Chaos […]
[…] 11. Colors Scrap Book at Everyday Celebrations 12. Baby Block on Sew Like My Mom 13. Baby Booster at Prudent Baby 14. Wipe Container Toy Upcycle at A Spotted Pony 15. Colors Book at My Everyday Chaos […]
Some links may be affiliate links. Through Amazon Associates and other partnerships, we receive money if you buy something or take an action after clicking one of the links on our site.


Sorry about your finger but it was worth it – the seat looks great. I especially like the fabric you used. Where did you get it from?
That is fantabulous- the best part is that it's easy to remove and throw in the wash. I hate constantly scrubbing dried food off my son's plastic one…yuck.
So cute! But yikes!! I sewed through my finger in my collection development class when I was getting my AA in fashion design. Through the nail and out the TOP of my thumb…yeah kinda at a funky angle. I wasn't lucky enough to still have my machine threaded. My poor dad had to pull the thread out of my finger! Luckily I didn't get any blood on my project either..so be careful when sewing in the lining to a lined blazer!! LOL!
Love this! Fabulous! My "to do" list is getting huge but I'm bumping this one to the top. Thanks for the tutorial!
Sorry about your finger. It sounds really painful!
ouch! my finger hurts just thinking about it 🙁 but the seat is fabulous! I love it so much!
Yikes- your finger! =( Thanks so much for the project though, it's fabulous! I'll be linking.
Fantastic… soooooooo fun and functional! And professional looking too!
hi! that fabric is great, it came in an aqua blue as well. i'm 99% sure it is a paula prass for michael miller but i bought it at International Silks and Woolens and they don't have an online store 🙁
This is so beautiful. I REALLY want to make one.
PS. I can't believe you told me not to be afraid of my sewing machine. lies, LIES!
whatever. it didn't hurt. it was hilarious. MATERIAL.
Just made a similar one. I put some of those plastic craft filler beads in the bottom. I think I might add some ties. I think that will work better. My 5 year old likes the boost without it feeling like a baby's chair.
You did an EXCELLENT job on the booster seat!! They would make really cute baby shower presents too!
Awesome project!! My daughter is old enough that she doesn't need a booster seat anymore, but my sweet 93-year-old grandmother could really use one of these!
I blogged your tutorial at Craft Gossip Sewing:
http://sewing.craftgossip.com/tutorial-sew-a-booster-seat/2010/01/30/
–Anne
I love this and I think I am going to try to make it with a slight modification: I plan to do my overlap on the back instead of on the bottom. That way if it gets dirty I can quickly flip it over and get another meal out of it before washing. Who am I trying to kid? I'm just thinking that if I have company drop in I can hide the grubbies by flipping it over real quick. 🙂
Definitely worth it – thankyou as well!
I sewed through my finger once – with the sewing machine. And only once! It was so painful I've been very careful since. Thanks for sharing all your great patterns.
Totally want to try this. Is it an easy product for a beginner?
I absolutely do not need one of these since my daughter HAS a booster seat, but OMG i must make one! Sorry about the finger – it WAS worth it! 🙂
Thanks so much! This is a great idea – definitely going to make one for DD. Sorry about your finger too! By the way, what kind of foam did you use and where did you get it?
i used regular upholstery foam and i got it at an upholstery fabric shop, but if you look up "foam" in your yellow pages or online yellow pages you will find local shops that just sell foam!
Super cute! I also put the opening in the back instead of on the bottom, and I used iron on fusible vinyl, so you can wipe it clean!
I LOVE this!! My 7 year old is small for her age and still has to sit in a booster chair sometimes. She's tired of the "baby" chair. I think this would really make her happy. Thanks for sharing it!!
I'm totally making this for me & a few friends! I love that it can match your decor & blend right in! And I sewed through my finger the other day too…not the nail, just next to the nail. It was terribly painful & in the moment I couldn't figure out how to move my needle so that I could get my finger free…it was a mess!
How much fabric should I get at the fabric store to start with? I'm so bad at adding up all the measured pieces and deciding on a yardage.
I'm sorry for your finger, and sorry for myself that I only stumbled upon this a day before we go on holiday…
Very much so! It's gorgeous!
Thank you for this GREAT pattern and the instructions!! Just finished making one for my 20 month old grandaughter. I appreciated the help very much.
This is awesome! I’ve just covered phone books in duct tape for my kids like parents did for me as a child…. but this is WAY CUTER!
Sorry about your finger… I’m guessing it’s healed by now considering this was several years ago. But, just so you know, I sympathized and winced as I read the horrific account of how it happened. 😉
Adding some non-skid to the bottom – we have a bench and nothing to tie to. Make like 5 so friends can sit. LOVE! Thanks!
Great tutorial,I have a piece of foam left over from a computer wrapping and a 2 year old who needs a booster.Thanks for the inspiration.To save yourself a step cut the ties into one long strip and cut them out after you have turned them inside out.
They do this same project in the ‘one year wonders’ book. They suggest 2″x12″ foam and fill the rest with buckwheat hulls so it is a bit more stable.
Someone essentially help to make significantly articles I would state. This is the very first time I frequented your website page and up to now? I amazed with the analysis you made to create this actual submit incredible. Fantastic task!
Hi,
Love the post, but I am not sure if i keep missing the part where u say the seam allowance measurement. From the pictures it looks like a half inch but from the pattern it looks like a quarter.
[…] 11. Colors Scrap Book at Everyday Celebrations 12. Baby Block on Sew Like My Mom 13. Baby Booster at Prudent Baby 14. Wipe Container Toy Upcycle at A Spotted Pony 15. Colors Book at My Everyday Chaos […]
[…] 11. Colors Scrap Book at Everyday Celebrations 12. Baby Block on Sew Like My Mom 13. Baby Booster at Prudent Baby 14. Wipe Container Toy Upcycle at A Spotted Pony 15. Colors Book at My Everyday Chaos […]