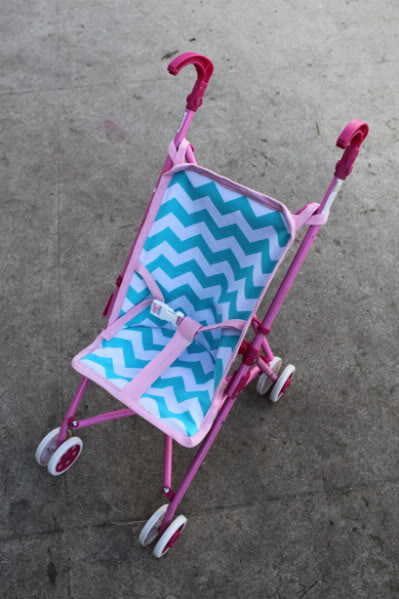
“Meema” bought Scarlet this doll stroller for $1 at a garage sale. Scarlet LOVES it, but the liner has seen better days, so I decided to create a DIY doll stroller liner tutorial. Also, if you have a boy who likes doll strollers but not so much the pink they usually come in, this would be your chance to throw some planets or truck fabric on it. Or make him a new pink one and tell him this isn’t 1954, real men love pink.
1. Assemble your materials and pre-wash your fabric. You’ll need 1/4 yard of fabric (i used two different fabrics equaling a quarter yard, but you can use the same on both sides, or you can make it one-sided and use even less fabric) and three yards of single-fold cotton webbing.
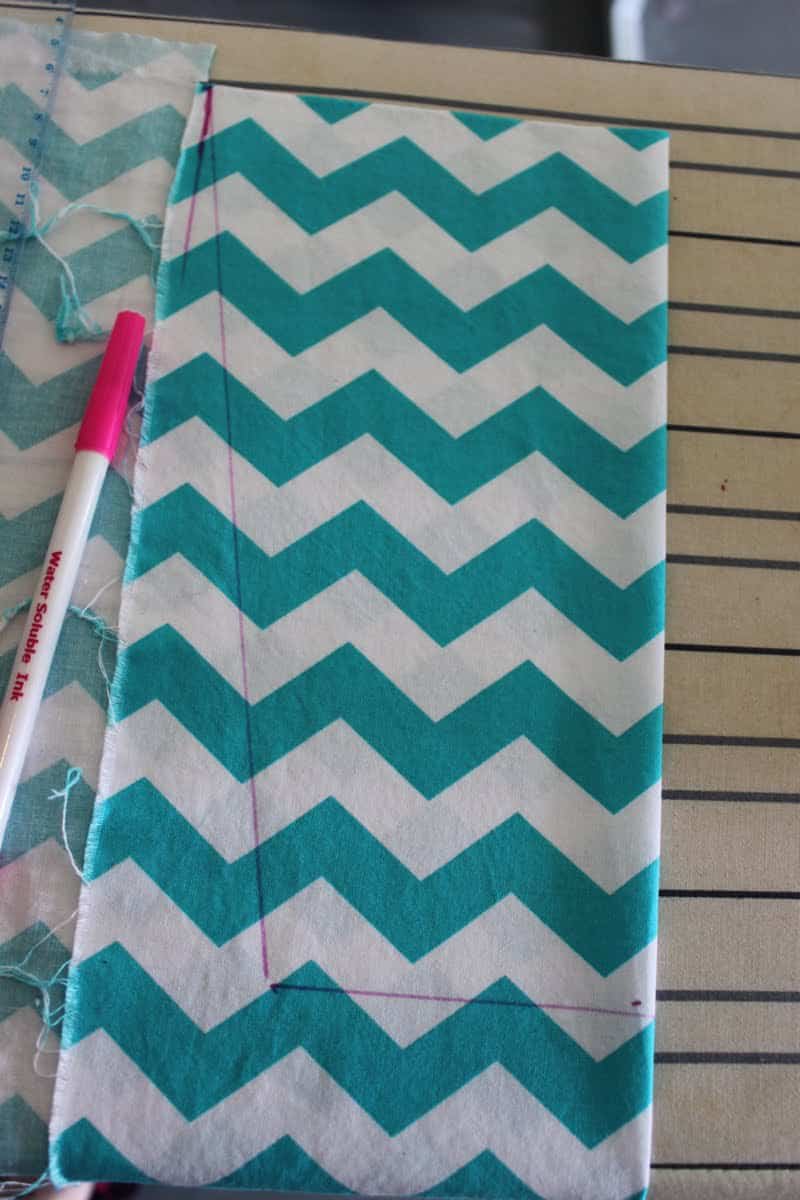
2. Iron and cut your fabric. For the top (back of the seat of your stroller) you need one piece that is a trapezoid. It will end up 12 inches tall, 8 inches across the top, and 12 inches across the bottom. To cut it to this shape, fold your fabric in half and using a washable fabric marker draw a 4″ line at the top. Measure 12″ straight down from there on the fold and draw a 6″ line at the bottom. Using a ruler as a straight edge, draw a diagonal line from the end of your 4″ line to your 6″ line like so:
Cut it out.
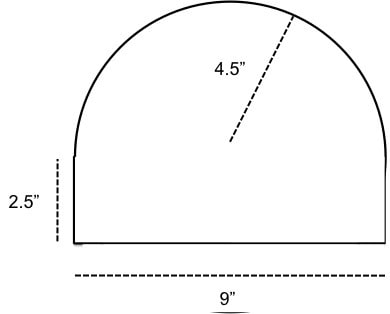
The bottom (seat) portion is a little more tricky so I made a drawing of what it should look like:
Cut it out.
If you are doing a two-sided cover, cut another piece of each exactly the same in the same or a different fabric.
Cut one more piece, 9″ X 2.5″ of the same fabric as the back of your stroller liner.
Cut your cotton webbing into pieces of these lengths: 2 pieces 35″ long 2 pieces 5.5″ long 2 pieces 7″ long 1 pieces 10″ long
3. Ok, let’s start sewing. First take your 9″X2.5″ piece and fold over one ong edge 1/4″ and iron, then another 1/4″ and iron, then sew the hem in place with a straight stitch:
Now take the bottom piece of your seat and place it right side up. Pin this piece along the bottom with the hem to the inside, right side up and sew in place around the edges (excuse the other seam you see in my picture, realized after the fact I did this in the wrong order, so i’m telling you the better way to do it):
Now you want to measure in 1.5″ from each edge and sew a 6″ straight line (straighter then mine, ha) in the middle. Do it towards the top (you can do it on top of your hem if you want). This creates the pockets that will attach the seat to the stroller:
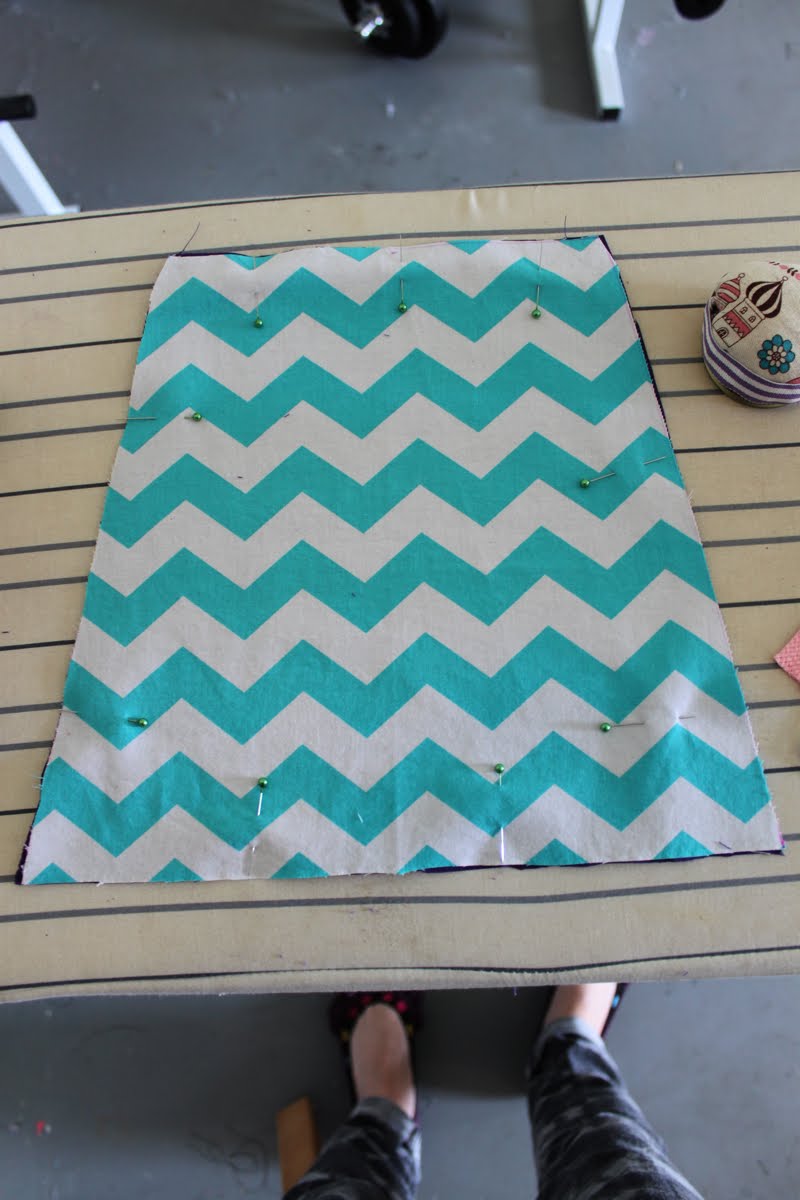
4. Now we will sew our backs and fronts together. If you are doing a one-sided stroller liner you can skip this step. Take your two pieces for the stroller back and pin them together wrong sides facing (so you see your pattern):
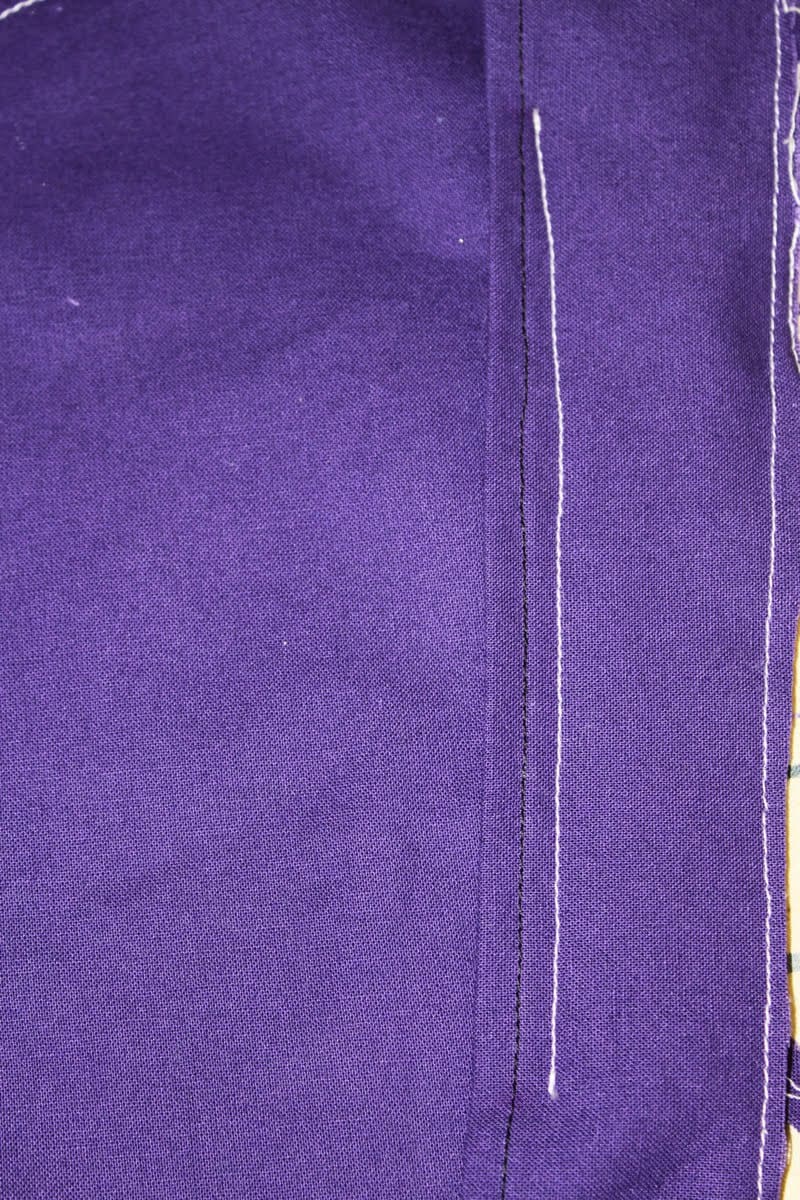
and sew all the way around the edge with 1/4″ seam allowance:
Do the same thing with the two seat pieces:
5. Take two of your 5.5″ pieces of cotton webbing and make them into loops, pin one to each of the top corners on the back side of your stoller, with the loop to the inside like so:
6. Now take one of your long pieces of cotton webbing and open it up. You’ll notice one side is just slightly longer then the other, you want the longer side on the bottom (this will help ensure you catch it while you sew).
Pin each of the two 7″ pieces of cotton webbing 6″ down from the top of the stroller on the front side with the length inward, under the cotton webbing trim. Wrap the webbing around the edges of your seat and pin in place leaving the 12″ edge unfinished:
Sew it all in place with coordinating thread.
7. Now fold it in half to find the center of the bottom and mark with a pin. Fold your seat piece in half and do the same to the rounded side:
Match your centers up and pin, with front sides facing:
Continue pinning the unfinished edge of the top to the round part of the seat without gathering it:
From the top it will look like this:
Sew that in place around the edge.
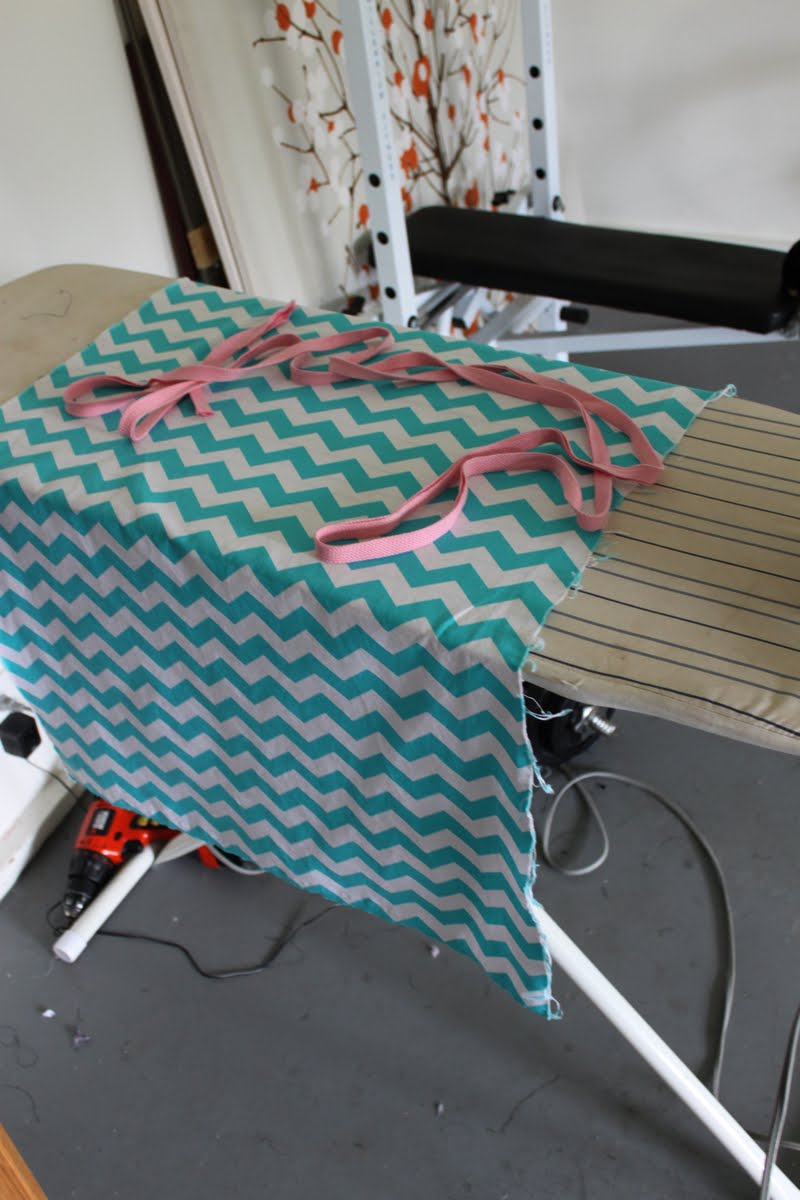
8. Now unfold your cotton webbing and pin it around the edge you just sewed:
On the front of the seat portion, attached your 10″ piece of cotton webbing right in the middle. I opened mine up just to be different:
Sew that in place.
9. Now cut the plastic hardware off of your old stroller (or buy a new set if you want) and insert the webbing through one side and sew it on. On the other side, insert the webbing and just sew the end over:
For the long piece in the middle, fold it over to make a loop and sew the end in place. I then went back to all of these edges with some fabric glue to prevent fraying:
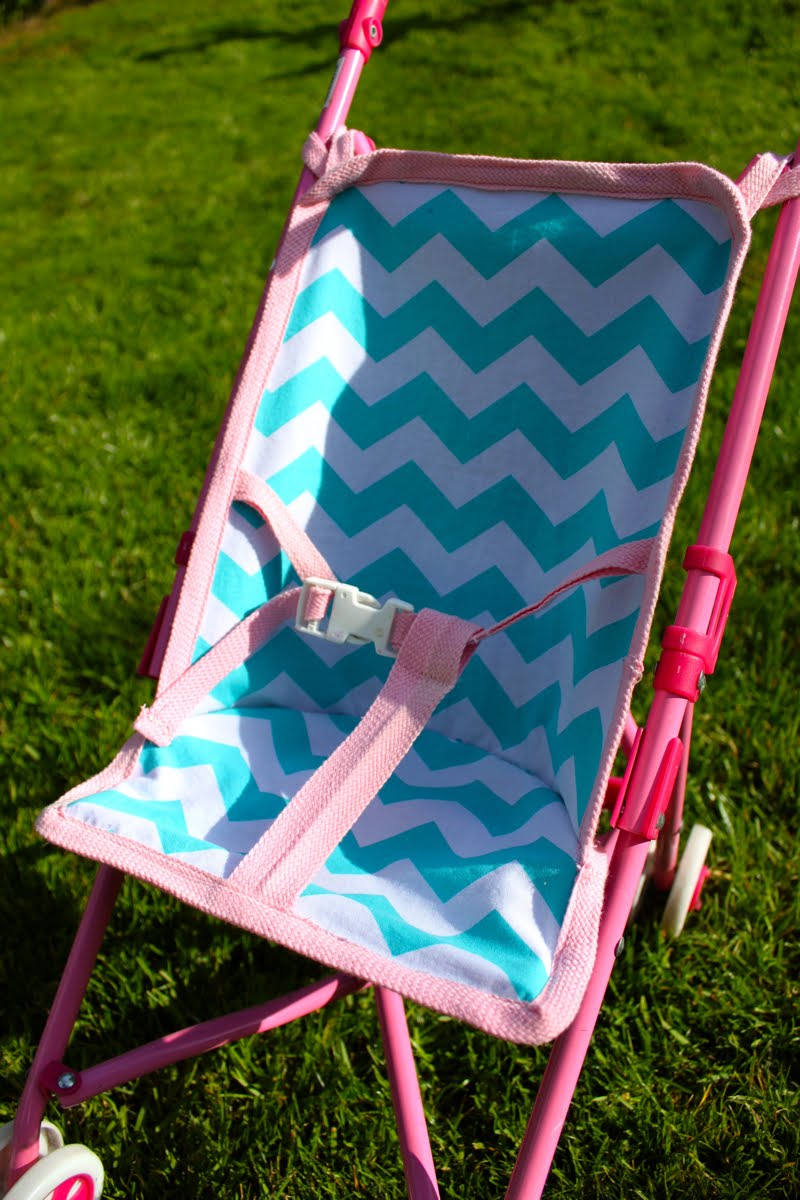
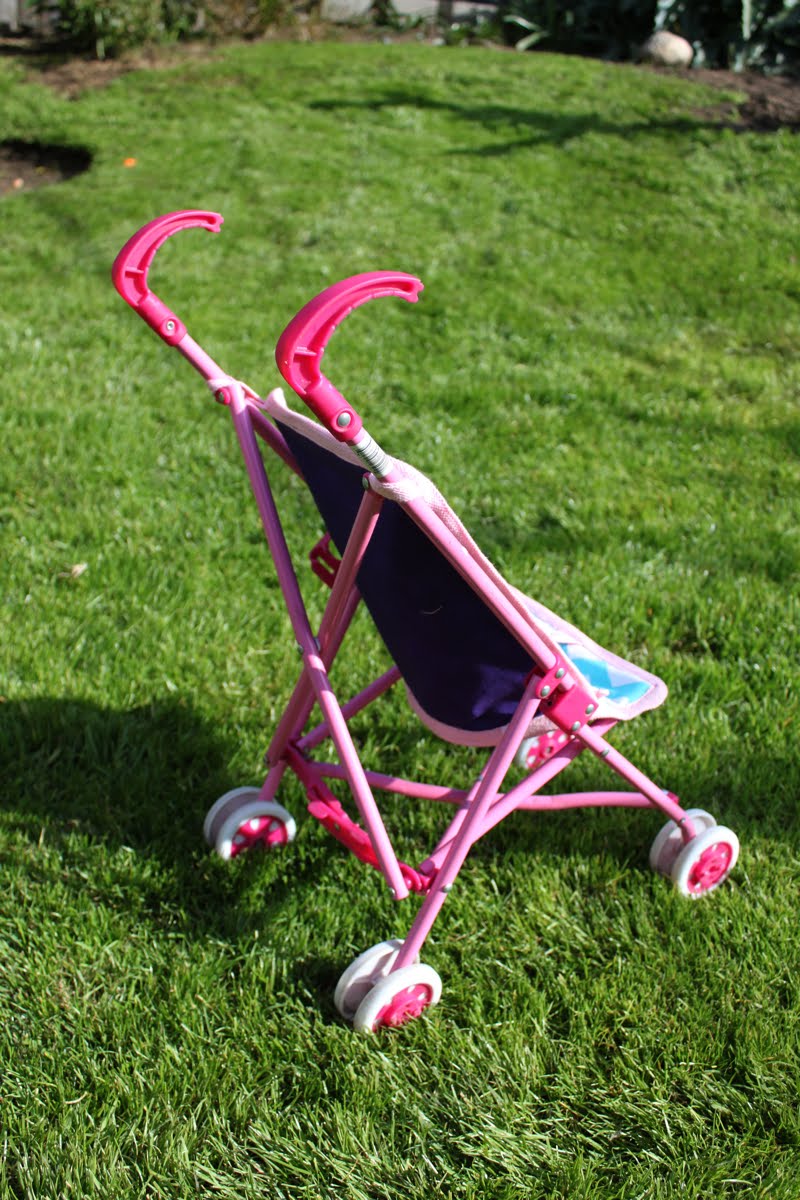
You’re done! Put it on your stroller!
From the front:
From the back:
Yay!
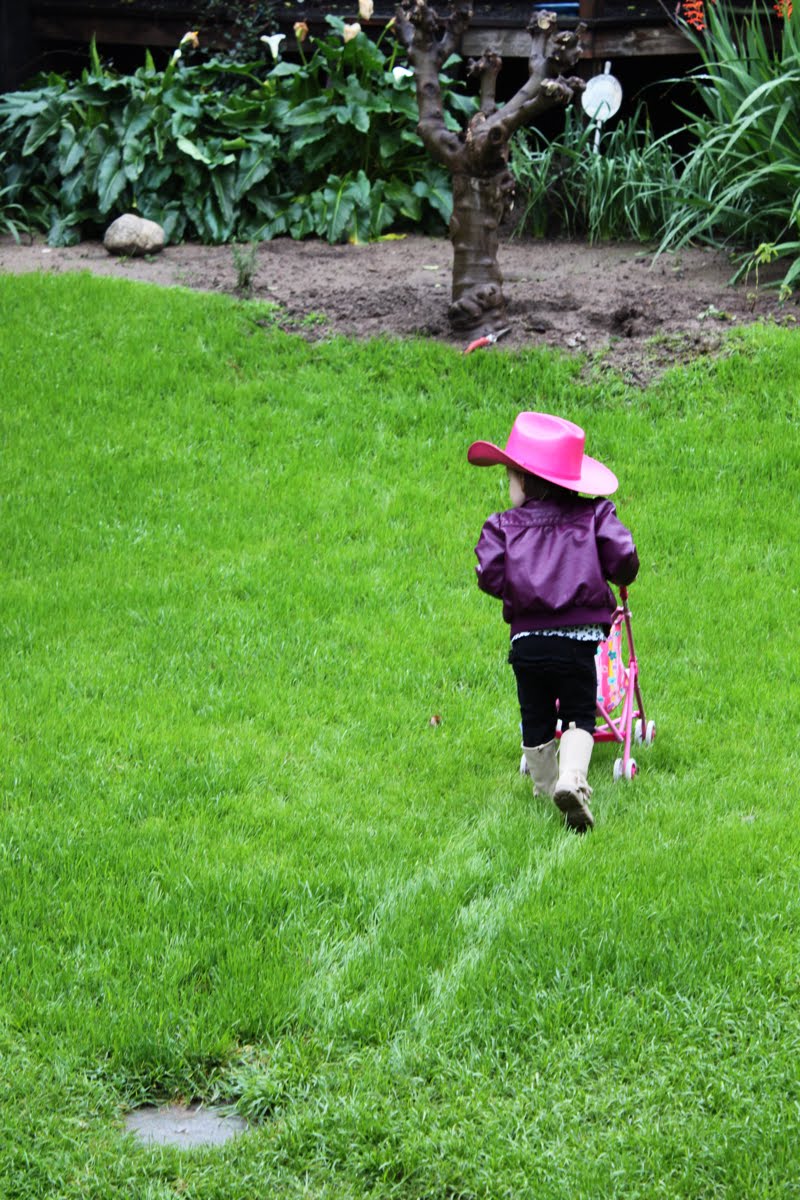
and i just realized this post is an excuse to post one of my favorite scarlet pictures ever…
What a gorgeous make-over! Perhaps I can stop threatening Clare that she will have NO MORE DOLLY STROLLER if it rips from her sitting in it. Mean mommy.
Oh my gosh! Thank you for this tuorial. My two girls each got the same type of stroller for Christmas and the darn seats keep ripping apart. I just now ran to the kitchen to rescue them because I was so frustrated that they were going to get tossed into the dumpster today. Now that I can make new seats for them I won't have to listen to them tell on me to their Dad, "Mom, is throwing away our strollers, but we LOVE them!". So, thank you so very much. you're a sanity saver.
Thanks for that great tutorial! I bought one of these strollers at a consignment sale and it, too, has seen better days. (Not to mention the fabric is ugly!) I'll get to this when I can find some free time!
This is such a great idea!! My daughter loved her dolly stroller when she was little. One of my daughter's friends got the big idea to sit in her doll stroller and ripped the fabric. (We got the stroller used and I think the fabric was fairly weakened with wear.) We ended up replacing it with a new stroller, but had we seen this tutorial we would have just replaced the seat.
thanks for all the kind words! i just wanted to add that in retrospect it doesn't really need two layers and it doesn't make it that much cuter, so I think you can save yourself the time…
Just what I was looking for to replace my daughter's stroller liner…destroyed by little brothers! Your tutorial will save me the time of trying to figure it out myself.
Oooh, I love this idea…but I'm gonna go a step further and do it for our umbrella stroller (for the kid, not the doll), we got it at a consignment shop cheap,but the fabric is dirty and ugly!
OMG, i never thought of doing that! Arianna just broke hers recently from too many times of HER sitting in it! We just got her a new one, I never thought of making a new seat for it! You are so brilliant!
I'm so happy to report that I finished my daughter's stroller liner thanks to you!! I even went a step further(because hers had a canopy) and made hers with a canopy. Do you have a flicker group? I'd love to post my photo.
Thats so cute! LOve the idea. Do you know how to make stroller liners for baby strollers? I'd love to make monkey a few for protecting the stroller's seat
This is beyond perfect timing! Just a few days ago a friend gave me a doll stroller with a busted liner. I figured I could rig something up to make it work for my doll-loving little girl. Now I don't have to! Thanks so much for sharing!
Sweet! Now I can make a "Boyish" liner for the 2nd toy stroller that my 7yr old son insists on using! He and my 3yr old daughter like pushing their stuffed doggies (and the live cat if they can catch him… poor thing) around in them!
This is GREAT!!!! My daughter got a stroller for her birthday last year and the seat ripped within a couple of weeks. Now my boys use it as a scooter in our kitchen and run me over. This tutorial means that I can save the stroller and my ankles! YAY! My daughter will be thrilled to be able to push her babies around again.
For clarification for us beginning sewers, you're talking about a "fat quarter," since a true 1/4 of fabric is only 9 inches wide… and the pattern is 12 inches wide at the widest point, correct? Thx!
Hi Can someone make one for my daughters stroller…I can't sew very well and I don't have a sewing machine. I will pay you for it, you name the price. Please, and Thank you
I just made this tonight and it is awesome! I used two dishtowels (that were more like a duck cloth than a towel and would have been terrible as towels) with a super cute polka dot print. They were two for $1 at the dollar store! I also used the hemmed edges of the towel as the straps and since I made it double-sided I sewed right sides together and then turned so I didn't have to mess with the webbing/ trim. 🙂 Thanks for the great tutorial! Tracy @ http://www.naptimecraftmommy.blogspot.com
Would you be interested in making one of these for me? I love chevron print! Let me know how much. I can send you the money through PayPal. Thanks so much. Adpierce@sbcglobal.net
[…] therefore a compromise was found in the way of this gorgeous Michael Miller fabric. I opened up this tutorial, then added my own tweaks, making it reversible with a grey paisley print on the back (will add […]
Love your tutorial but in trying to make the reversible seat, I am not clearly understanding how to place the seat bottoms so they will hold the seat onto the frame. Am I sewing it backwards? Any info you can give will be much appreciated and I know my granddaughter(s) will be delighted!
I’m so sorry but I don’t think I understand the question! The loops are what hold it onto the frame. Give me some more specifics and I will try to answer!
Some links may be affiliate links. Through Amazon Associates and other partnerships, we receive money if you buy something or take an action after clicking one of the links on our site.


What a gorgeous make-over! Perhaps I can stop threatening Clare that she will have NO MORE DOLLY STROLLER if it rips from her sitting in it. Mean mommy.
Oh my gosh! Thank you for this tuorial. My two girls each got the same type of stroller for Christmas and the darn seats keep ripping apart. I just now ran to the kitchen to rescue them because I was so frustrated that they were going to get tossed into the dumpster today. Now that I can make new seats for them I won't have to listen to them tell on me to their Dad, "Mom, is throwing away our strollers, but we LOVE them!". So, thank you so very much. you're a sanity saver.
Thanks for that great tutorial! I bought one of these strollers at a consignment sale and it, too, has seen better days. (Not to mention the fabric is ugly!) I'll get to this when I can find some free time!
That is way cute! I love the new fabric. I'll be linking.
Love the zig zags! Maybe I could make one of these for my nieces.
This is such a great idea!! My daughter loved her dolly stroller when she was little. One of my daughter's friends got the big idea to sit in her doll stroller and ripped the fabric. (We got the stroller used and I think the fabric was fairly weakened with wear.) We ended up replacing it with a new stroller, but had we seen this tutorial we would have just replaced the seat.
I blogged your tutorial over at Craft Gossip here:
http://sewing.craftgossip.com/tutorial-sew-a-new-seat-for-a-dolly-stroller/2010/02/01/
–Anne
thanks for all the kind words! i just wanted to add that in retrospect it doesn't really need two layers and it doesn't make it that much cuter, so I think you can save yourself the time…
Too cool! I did the same thing!!
http://elislids.blogspot.com/2009/08/stroller-overhaul.html
Just found your blog while hopping around 🙂
So clever! Our stroller is starting to show its age…now I know what to do with it.
This is awesome! We have this same stroller and the lining is ripping off. I'll have to give this a try!
Just what I was looking for to replace my daughter's stroller liner…destroyed by little brothers! Your tutorial will save me the time of trying to figure it out myself.
Oooh, I love this idea…but I'm gonna go a step further and do it for our umbrella stroller (for the kid, not the doll), we got it at a consignment shop cheap,but the fabric is dirty and ugly!
OMG, i never thought of doing that! Arianna just broke hers recently from too many times of HER sitting in it! We just got her a new one, I never thought of making a new seat for it! You are so brilliant!
I'm so happy to report that I finished my daughter's stroller liner thanks to you!! I even went a step further(because hers had a canopy) and made hers with a canopy. Do you have a flicker group? I'd love to post my photo.
Thank you for inspiring me everyday!!!
Thats so cute! LOve the idea. Do you know how to make stroller liners for baby strollers? I'd love to make monkey a few for protecting the stroller's seat
YEAH!!! I am so glad I didn't throw out my Maddy girls stroller! I can't wait to get to work on it!
This is beyond perfect timing! Just a few days ago a friend gave me a doll stroller with a busted liner. I figured I could rig something up to make it work for my doll-loving little girl. Now I don't have to! Thanks so much for sharing!
Sweet! Now I can make a "Boyish" liner for the 2nd toy stroller that my 7yr old son insists on using! He and my 3yr old daughter like pushing their stuffed doggies (and the live cat if they can catch him… poor thing) around in them!
This is GREAT!!!! My daughter got a stroller for her birthday last year and the seat ripped within a couple of weeks. Now my boys use it as a scooter in our kitchen and run me over. This tutorial means that I can save the stroller and my ankles! YAY! My daughter will be thrilled to be able to push her babies around again.
For clarification for us beginning sewers, you're talking about a "fat quarter," since a true 1/4 of fabric is only 9 inches wide… and the pattern is 12 inches wide at the widest point, correct? Thx!
amber – i think so! now i can't remember because it's been so long. good catch!
Hi Can someone make one for my daughters stroller…I can't sew very well and I don't have a sewing machine. I will pay you for it, you name the price. Please, and Thank you
My email address is donnanasser1@gmail.com
I just made this tonight and it is awesome! I used two dishtowels (that were more like a duck cloth than a towel and would have been terrible as towels) with a super cute polka dot print. They were two for $1 at the dollar store! I also used the hemmed edges of the towel as the straps and since I made it double-sided I sewed right sides together and then turned so I didn't have to mess with the webbing/ trim. 🙂 Thanks for the great tutorial!
Tracy @ http://www.naptimecraftmommy.blogspot.com
Would you be interested in making one of these for me? I love chevron print! Let me know how much. I can send you the money through PayPal. Thanks so much. Adpierce@sbcglobal.net
[…] therefore a compromise was found in the way of this gorgeous Michael Miller fabric. I opened up this tutorial, then added my own tweaks, making it reversible with a grey paisley print on the back (will add […]
Hi,
where did you get the single fold webbing?
Jeri Israel
Love your tutorial but in trying to make the reversible seat, I am not clearly understanding how to place the seat bottoms so they will hold the seat onto the frame. Am I sewing it backwards? Any info you can give will be much appreciated and I know my granddaughter(s) will be delighted!
I’m so sorry but I don’t think I understand the question! The loops are what hold it onto the frame. Give me some more specifics and I will try to answer!
Thanks so much.
Thank you for the tutorial, my granddaughter’s stroller was ripped and it looks so good now.
Sorry I’m having trouble getting the full sewing pattern, how do I get this? I’m excited to do this. Thanks!