


I picked up this pretty voile at City Craft during my visit to Dallas and was so excited to make a little summer dress for Scarlet (you can find this fabric online here). I used elastic thread to create shirring, which is nothing new, except I figured out how to make elastic thread work in my drop-in bobbin! Any of you that have a newer machine might be frustrated that elastic thread just won’t seem to work! I decided I couldn’t take it anymore and camped out, messing with the machine until I had it figured out. 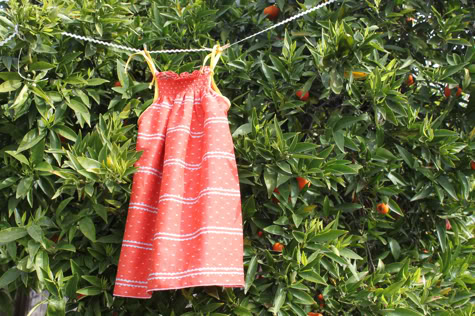
I’ll tell you what worked for me as well as share this Sweet Shirred Summer Dress pattern after the jump…
Sweet Shirred Summer Dress

1. Wash, dry and cut your fabric. It’s better to use a light weight fabric for this dress, I used a voile. You could use a regular printed cotton but it might not shirr as well (when i tested it out it didn’t gather as prettily). You can cut two panels (one for the front, one for the back) into rectangles with no armholes and it will work just fine when shirred, but I cut a j-shaped armhole to make it extra deep. You want the width to be about 2 times the width of your finished chest measurement. But again, you don’t need to be to specific and the best way is just to look at a dress that fits your giftee and cut a piece 1.5 up to 2 times wider then that dress. For the length, cut it the length you want from the top of the chest to below the knee, plus 1″.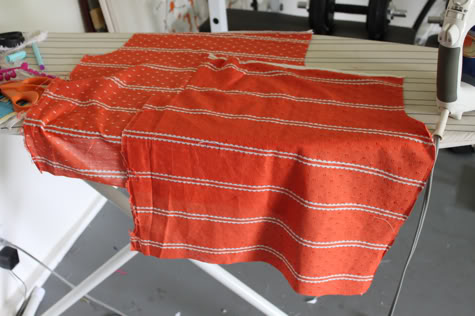
2. Start by folding the top edge of each piece in 1/4″ and iron, another 1/4″ and iron, and hem in place: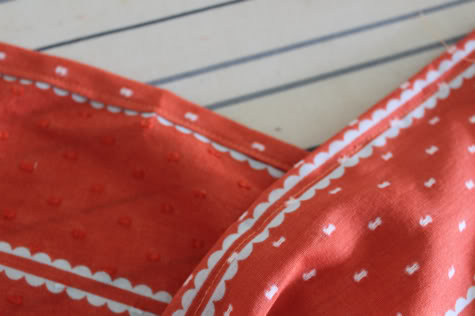
3. Now to shirr. If you are using a sewing machine with a bobbin case, handwind your elastic thread around the bobbin. If you are using a drop-in bobbin machine, that might work, but for most new machines it won’t. Usually you need toa djust the bobbin tension, but I don’t like to mess with that. Some people keep two seperate bobbins, one with the factory tension and one adjusted for elastic thread. I messed around with sewing shirring a bunch of different ways WITHOUT adjusting the bobbin tension, and what worked for my machine was actually the easiest – using the bobbin winder to wind the bobbin so the elastic thread was stretched out, and then setting the stitch width to 3.5. Doing this, I got a perfect shir. So you load elastic thread into the bobbin and regular thread in a coordinating color on the top. If you are nervous about sewing straight lines, you can pre-draw the lines 1/4″ apart starting 1/4″ below your hem with a water or air-erasable marker. I did it without drawing. Sew 8 lines 1/4 apart, back stitching at the beginning and end: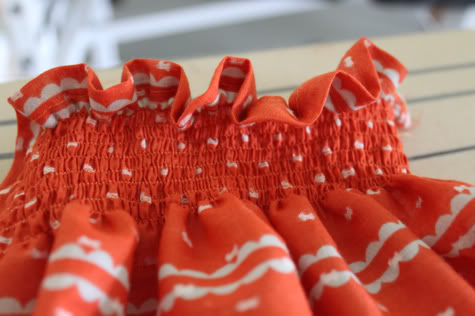
This is what it looks like from the back: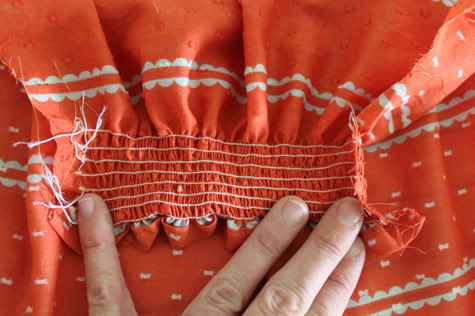
Repeat on the other piece.
4. Now lay your front and back pieces right sides facing and sew the sides together from the bottom to just below the armhole: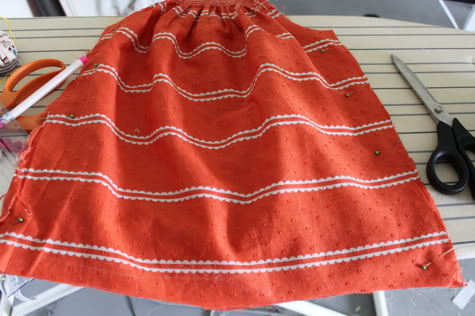
Finish by serging, sewing with an overlock or zig zag stitch, or just cutting with pinking shears: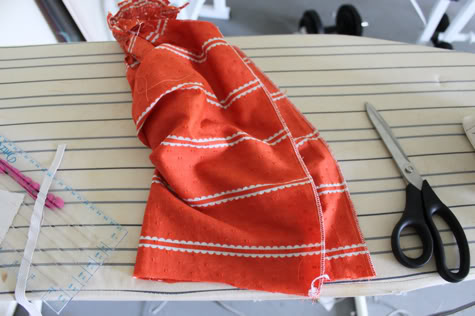
5. Now hem the bottom. I serged a rolled hem but you can do a traditional hem by folding and ironing 1/4″ then another 1/4″ and stitching in place with a straight or blind hem stitch.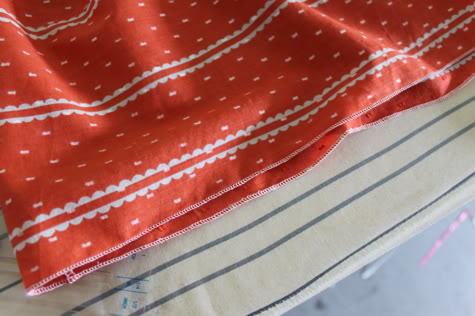
6. Now grab your double fold bias tape and check which side is shorter. That’s the side you want on top. Fold the length of tape in half to find the middle, then unfold and pin the open short side to the center of the armhole: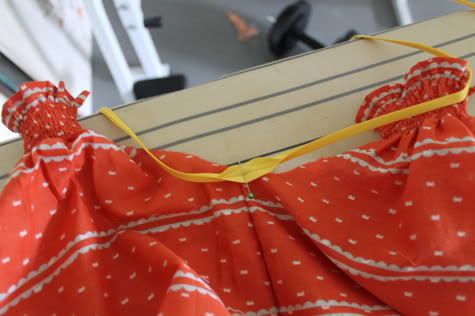
Continue to pin all the way around: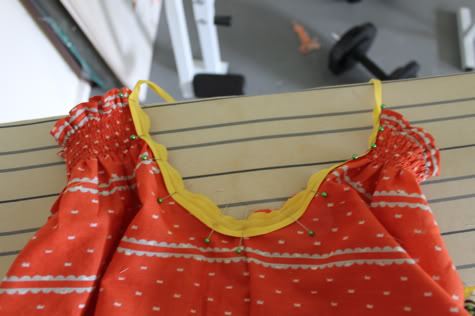
Sew in place along the fold: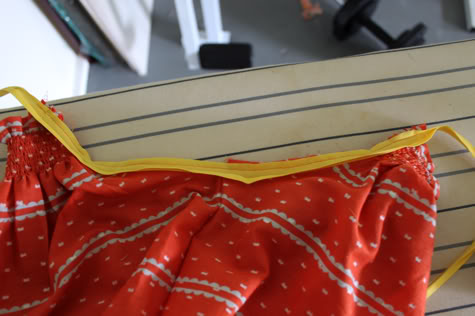
Now fold the tape over to the inside, encasing your unfinished edge, and pin: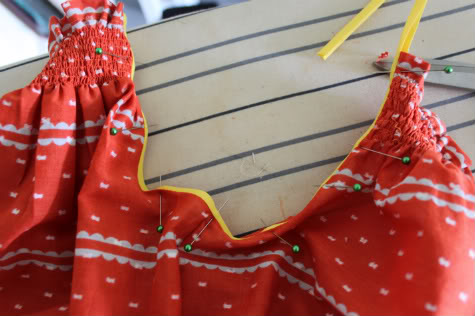
Sew in place. I didn’t have matching yellow thread so I carefully sewed just inside the bias tape, catching the bottom edge: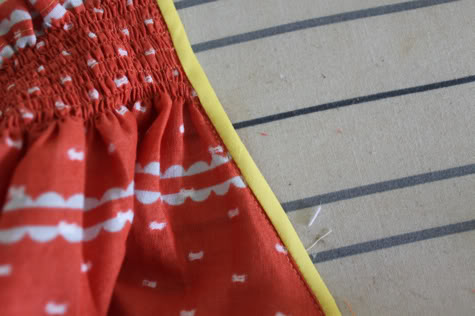
Repeat on the other armhole.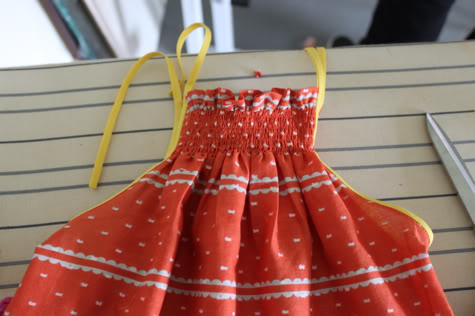
Tie the ends of the bias tape in knots. You’re done!
sit back and relax:
or read Goodnight Moon…
Love it. And thanks for the info re drop-in bobbins. I haven't tried shirring yet, but one day…!
I’m new here… where is the link to the dress?
Thank you for the good tips for the drop in bobbins. I have tried shirring but it didn't turn out very well. I will be giving it another try.
adorable dress from the perfect voile print (love that one!)
I have had great success w/Sandi Henderson's shirring tutorial (which is free on her site). You can handwind the bobbin w/the elastic thread (you have to do it gently and not pull); on my front loading bobbin, I only adjust the tension slightly and it comes out great every time!
I may try out your method though too 🙂
thanks moni rose! if it works the way you are doing it, i wouldn't try it my way..every machine is different. i used to have a front-loading bobbin machine, and hand winding with no tension worked great, but on my drop-in bobbin machine, the machine is so fancy it automatically adjusts the tension so it won't shirr. i would end up with a wavy line of stitches on the bottom and no gather. so for my machine, winding the bobbin really tight and setting the stitch width to 3.5 worked, but it would probably gunk-up in a front load bobbin. i just don't want that to happen to you!
This is SO cute! Putting it in my list of projects to do when I move and get a sewing machine! 🙂
This is so beautiful Jaime! Love the drop-in bobbin tip! And girls, if you haven't felt voile in person, it's heaven, especially for summer clothing! Expect more projects made from this lovely fabric. Jaime and I are both big fans!
I adore this dress!
This is beautiful! What a wonderful fabric choice. Thanks so much for sharing this, I'll be linking.
fyi i only let my daughter read books that color coordinate with her outfits.
I see a lot of hair under that hat Jaime! And, my GOD she's beautiful!! Oh and the dress is pretty adorable too 🙂
What a sweet little dress!! And so carefree for summer!
I linked to your tutorial on Craft Gossip Sewing:
http://sewing.craftgossip.com/tutorial-shirred-summer-sundress-for-toddlers/2010/03/23/
–Anne
Very cute. I always love cute little girl dresses!
I could kiss you and I don't even know you! I found you from oneprettything and I have searched and searched on how to shirr. I was soooooo frustrated because it wouldn't work like they would say it did. I tried your way and it works. I'm in the mood to sew again. I've literally hated my sewing machine since I tried and failed several times (over a month ago!) YOU ROCK!
yay kayla your comment totally made my day! i'm so glad it worked for you too!
Yeah, I am so glad you didn't give up on shirring!. I haven't been able to figure out how to do it on my machine and now I am motivated to try again. Your dress turned out so great. Thanks for the awesome tutorial.
A much easier way to do elastic shirring without fiddling with your bobbin: Narrow hem the top edge that will be a ruffle . Mark rows on the back of the fabric about 1/2″ apart–use an even number of rows if you can. Working from the wrong side of the fabric, lay the elastic thread on each line and zig-zag over it with regular thread leaving a tail on both ends. Use a stitch width that is just wide enough to catch the elastic. If you have a presser foot that has a groove underneath–an embroidery foot–use it. When all rows have been done, tie off the elastic in pairs on one end and then pull up the tension on all the rows from the other end. Tie that end off in pairs also. Finish the dress as usual.
Thank you so much for the shirring tips. I am gonna try it again too. I did have one question about the straps on this dress: do you sew the bias tape "closed" the rest of the length of the ties or just leave it "open"?? Hope this makes sense!
YOU ARE THE BEST!!!!! I just tried it. AWESOME!!!!!
thank you thank you thank you!!!! I had given up on shirring and now I am going crazy looking for a pattern to make RIGHT NOW! Now I understand why everyone loves shirring clothes…it is soo FUN!!!
amy – i'm so happy it worked for you!! on this dress i used super-skinny bias tape so i just left it open the rest of the way. it's so thin and with the knot at the end it doesn't flap open, but you could sew it closed if you wanted too!
p.s. i'll be posting a super fun shirring pattern on monday so stay tuned!!!
I love the dress, I'm thrilled with the way it turned out – makes a pillowcase style dress SO much cuter (not that I don't love pillowcase dresses, but with as many as I've made my daughter I was looking for something "more")! Thanks also for the tips about shirring with a drop-in bobbin, it made me realize why the shirring had never worked before, and your tips made it work like a charm!!
courtney – are you saying you made one already? SEND ME A PICTURE!!!!!!!!
Oh I wish I had found this before Sunday! I was (of course) last minute finishing up her Easter dress and wanted to use shirring at the sleeves and neckline. Drove myself (and perhaps my poor husband) crazy trying to get the elastic thread to work. Will try using the bobbin winder to wind it… Now I need a new deadline to actually get the dress completed 🙂
I can't tell you how much I love this!
I made a one,based on your directions and posted it at http://sewingforscarlett.blogspot.com/. I hope you are ok with me posting a photo of your dress too!
Hi hi,
thanks so much for your tutorial.
I finally learnt how to do shirring!
I've linked u in my blog, tq so so much!
http://pearandthebabes.blogspot.com/2010/04/my-1st-shirring.html
Thank you for my piece of mind today and now my sewing obsession of shirring 🙂
Thank you SO MUCH for the awesome tutorial. I just made half of my little dress ( I ran out of Elastic thread, whoops!). I was so nervous to try this, as I also have a new fangled machine with a drop in bobbin. However, your way was perfect! I used regular cotton, so I guess it is a little thicker than voile. Thinking back, I should have only done 1.5 X the chest measurement ( I did 2 X) , but se lavi… It still looks (half done) fabulous! Thank you thank you.
Thanks for the drop-in bobbin shirring tips! I was making a shirt for my daughter yesterday and wrestling with the machine to try to get it to shirr. Well, I ended up sewing my fingertip to the machine and to the shirt I was making. Needless to say, the shirt is not finished yet, and I ended up taking a trip to urgent care to have the broken needle removed from my finger. I want to use your tips to give it another try.
oh holland…that's not funny but i'm totally laughing. been there. check out the DIY booster seat post, oy. hope you feel better soon!
Cute little girl and cute little dress. Now if only I have a baby girl. 🙂 Adorable! Thanks for sharing.
i can't believe how easy this was! totally not an experienced or confident seamstress, but your bobbin directions were totally perfect 😀
thanks so much– love your site!
thanks for the shirring tip. I've tried several times and it hasn't worked for me, so I'll try your way now!
I am a quilting Grammy with a five year old granddaughter….I would rather sew for her than anything else in the world…thanks so much for all your tips, patterns and ideas.
Marilyn
Thank you for this tip on drop-in bobbins. I was getting so frustrated when the elastic would bunch up and come out very loose. I found that winding it tighter (by hand) worked, but I will definitely try the bobbin winder next time! I will also have to try this dress! 🙂
Thank you, thank you , THANK YOU! I have been struggling for days now trying to figure out what I was doing wrong while shirring my daughters Christmas cress with my new sewing machine. I tried almost everything except letting the bobbin winder do the work since I have always heard this is a big no-no. Sure enough I went and followed your directions and it turned out perfectly. You saved my daughters Christmas outfit. Thank you once again from my no longer frustrated heart!
this is so lovely, i have a question, where can i find elastic thread? pls let me know (burundanguitas@gmail.com) i will love to try on it for my toddler girl bday party on january, I live in panama and summer is just about to start here. rgds, dalys.
I am in love with this dress idea! I made one for my niece and it was so cute (and easy) that i quickly made one for each of my twin girls! Now the three of them have cute matchy matchy dresses!
Thanks!
I have a Brother Innovis-40 and my elastic is all squiggly. Does anyone have any ideas as to what I'm doing wrong?
Thanks!
meg- since i wrote this tute i also got an innovis-40! it's such a great machine, right? the thing is, it's so smart that it adjusts tension for you, not realizing it has elastic thread in it. so i have had luck with the method above, but it's a challenge to out-think the machine and makes sewing with elastic thread a little stressful if you aren't comfortable adjusting your own bobbin tension every time. i asked my local dealer what to do, and he solved the problem for me. here goes: the best, and easiest, thing to do is to go to a local sewing shop and purchase a new bobbin casing (only a few bucks) and have them set the tension on it for you (tell them you want to use it to sew with elastic thread), then when you want to sew with elastic thread, just pop our your normal bobbin casing and pop in the pre-set bobbin casing you bought. done and done.
Wow! Thanks for the quick reply. At least that explains my issues… I thought I was going crazy! I'll give that a shot. 🙂 And I do love my Innovis!
THANK YOU SOOOOO MUCH for the information on using the elastic thread with a drop in bobbin! I’ve looked at several shirring tutorials and could find none that explained why nothing I did fixed the fact that my machine would not work with the elastic thread. I used the machine winder as you suggested and it was perfect. Thanks again!
awesome!
Same for me! I tried winding my bobbin by hand but it didn’t gather all that well. I used my bobbin winder & VOILA! – it worked perfectly! What pattern did you use for this dress or did you come up with your own?
so glad it worked! i made this one up 🙂
I can not get the elastic thread from coming unwound when I drop it into the machine. I am new to sewing and I have a basic machine. I know it is not a case bobbin and im 99% sure drop in is what I have. I just cant seem to get this to work. When I test it is just straight flat lines. HELP!!!!
[…] by this pin (25 tutorials for baby summer dresses), I decided to try my hand at the Sweet Shirred Summer Dress (featured on Prudent Baby… I love that […]
This is just the kind of dress I have been looking for for my daughter for summer. I can’t seem to find a link to the pattern tho. Please could you help? Thank you
Wow that was odd. I just wrote an extremely long comment but after I clicked submit my comment didn’t show up. Grrrr… well I’m not writing
all that over again. Regardless, just wanted to say fantastic blog!
[…] And here’s the follow-up from the Smocked skirt – prep post. Thanks to Prudent Baby’s explanations on how to smock: http://prudentbaby.com/2010/03/baby-kid/sweet-shirred-summer-dress-pattern-2/ […]
[…] and the hot weather have arrived. Time to start thinking about sewing some new dresses. Our shirred summer dress is a great option for little […]
After 2 hours of trying to shirr today with NO success I’m ready to bite someone’s head off. I’m excited to try your method for my self-adjusting bobbin tension top load (Viking) machine. You mention the stitch width you used was 3.5 what stitch length did you use? Was this just a straight stitch setting?
Thank you for figuring this out and sharing. I will definitely be trying it. You have given me hope and the enthusiasm to try again (tomorrow!)
help when i click on the pattern pdf it brings be back to this page.