


Sew a Reversible 40’s Inspired Sun Cap with Free Pattern to protect your loved one’s noggins this Summer.

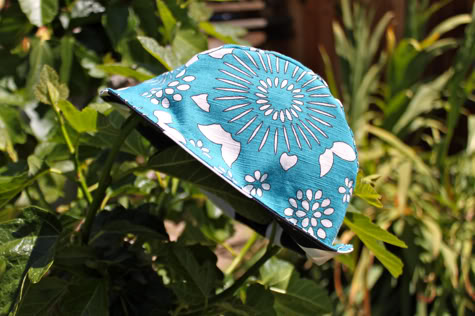
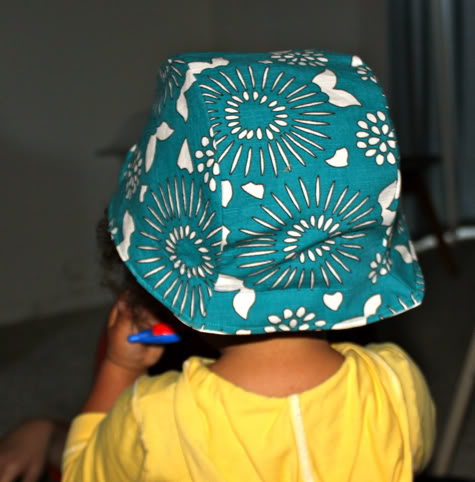
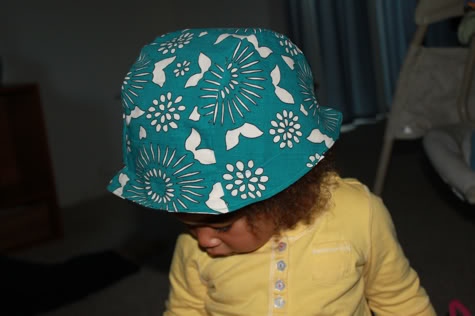
I just got this gorgeous Kei Japanese import Bark Cloth and was inspired to make up a little forties-ish cap-type sunhat. I hope you like it as much as Miss Niko did!
We have the free Forties Inspired Sun Cap Pattern and full tutorial after the jump!…
40’s Inspired Reversible Sun Cap
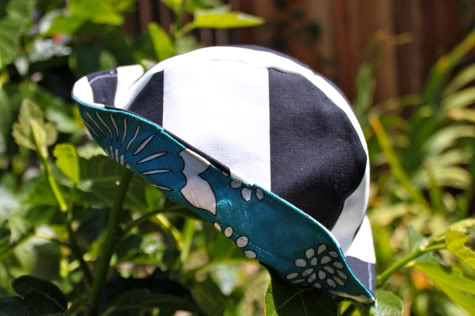
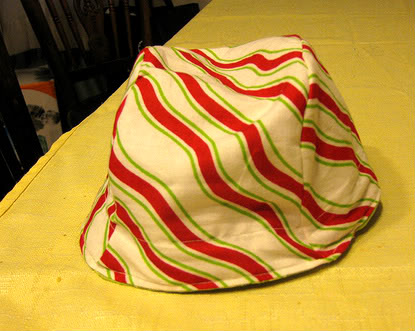
Here it is reversed out. I’d say go for a less bold pattern than these stripes, they look a little strange on the head:
1. Start by downloading, printing, and cutting out our pattern pieces. There has been some debate about what size baby this hat will fit in the comments, and I’m realizing that head size is sort of random. I suggest printing it out as is and holding the middle piece up to baby’s head. It should be almost as wide as baby’s head, if it’s not then scale the pattern up before printing. If it’s wider then baby’s head, scale the whole pattern down. And let us know how the sizing worked for you in the comments. At the end of the post I’m going to add some pics of some other version and describe the sizing…
Download the free pattern here: Pretty Prudent Sun Cap
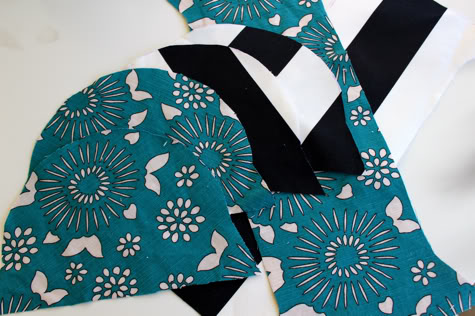
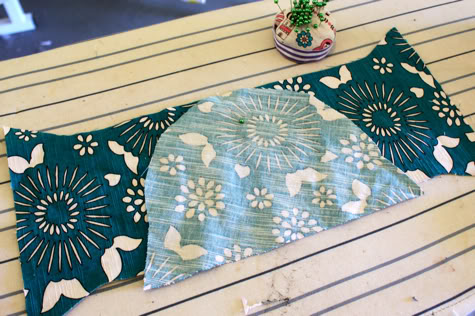
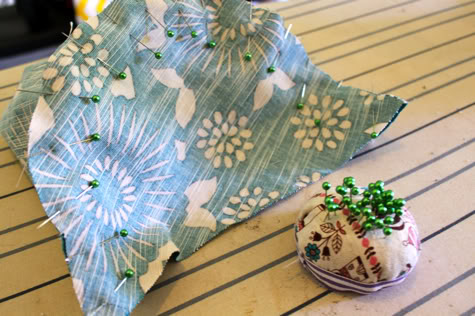
2. Trace your pattern pieces onto your fabric. You’ll have three pieces for each side (1 middle and 2 sides):
3. Fold your middle piece in half to find the center and with right sides facing, pin the center of one side piece to it:
Pull the ends in and pin them in place, edges aligned:
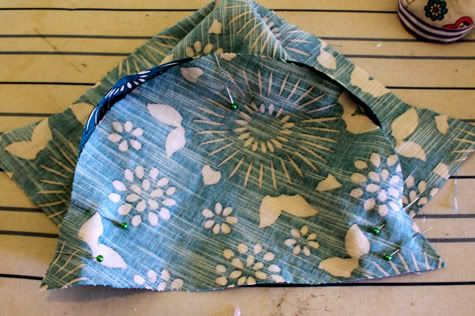
Continue to pin all the way around:
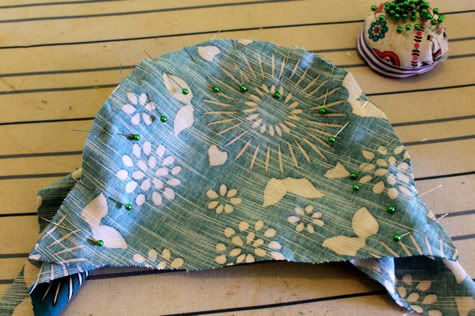
Sew in place with a 5/8″ seam allowance, then trim the edges:
Repeat with the other side piece, attaching it to the opposite side of the middle piece:
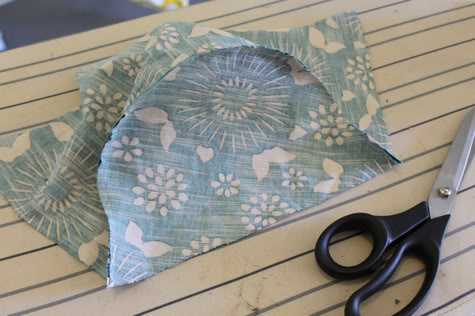
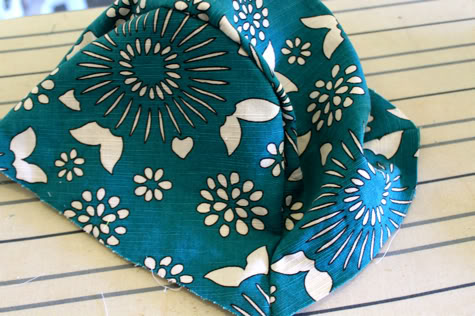
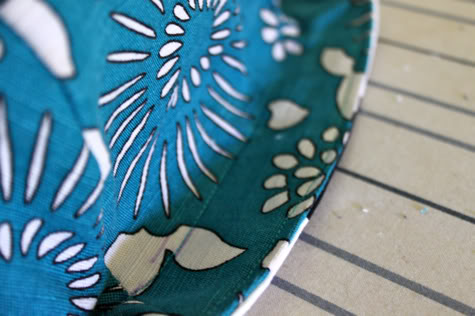
Sew in place and turn right side out:
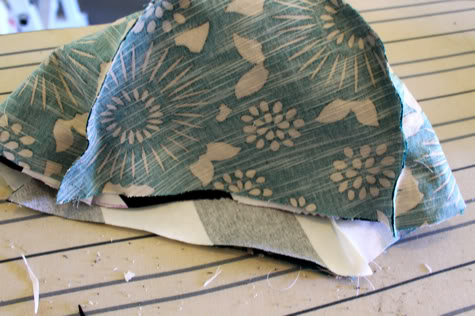
4. Do the same with your other set of fabrics for the inside or your hat. With right sides facing, slide one assembled hat piece into the other like so:
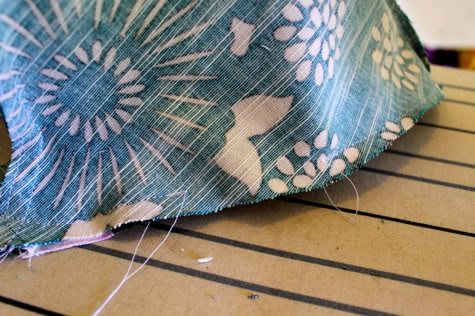
Sew in place around the edge with a 1/4″ seam, leaving a hole for turning on one side, back stitching at the beginning and end:
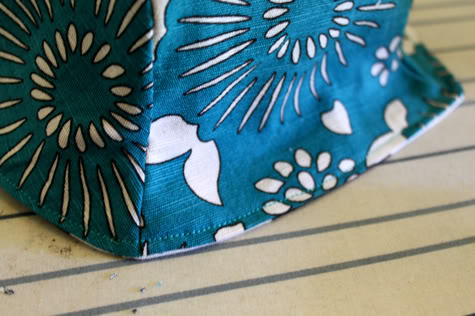
Turn your hat right side out through the hole, then top stitch about 1/8″ to 1/4″ in all the way around. You may want to use a different color in the bobbin and spool so your stitches match your fabric:
Measure 1.5″ in all the way around, mark with an air erasable marker, and sew another line of stitches.
You, my friend, are done!
Reader Jmoose made one at the same size as the pattern and it fits her one year old (who wears size 24 month clothes):
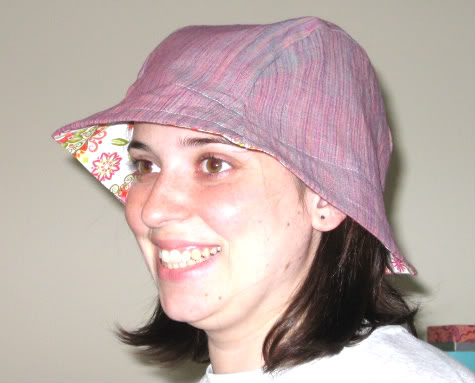
I made one for myself with the pattern increased to 120% and it looked like this…a little small, the brim is a little short…

And reader Sara made this one for herself using a different method, which i think turned out way cuter, which I will let her tell you about at her blog My Craft Chronicle:
If you love the DIY Reversible Bonnet & Free Downloadable Pattern, take a look at our other free baby hat and bonnet sewing patterns.
DIY Baby Bonnet with Leather Ties with Free Pattern
Crochet Bonnet DIY
DIY Fleece Bonnet with Free Pattern
Summery Sun Hat with Free Downloadable Pattern!
Cute! That could work for a boy too… right?
ca-ute! and so easy, it looks like. I'll have to try this one.
Beautiful! I'm gonna try this one! Tks
I think I'd like to make one of these for myself! Would you have suggestions on how to alter the pattern for an adult size?
sara, just size it up to 120 or 125% percent!
I may make one for myself also. Made one for my son today but it didnt fit.. hes 10 months old .. ( scaled it down to 80% for him).. I think ill try again.. I lOOOOOOOve it!
squirt! that's a bummer, i'm sorry! head size is such a difficult thing to pattern for! was it too small or too big?
I made this hat last night – it is so cute!!! I am a newbie sewer, following the directions exactly and it took less than 2 hours (probably only 1 hour).
FYI – my daughter is just a year old (wearing 24 mo. clothes) and has a good head of hair and this hat just fits. I will make another one a little bit bigger for her. My 4 year old son also wants one, so I might enlarge by 20% to see how it works.
Thanks for sharing your tutorial!
jmoose thanks for the feedbacl. okay so i am changing the sizing notes because i know i can't predict! and send us a picture!!!
yeah I think the 100% would work for my 10 month old ( he is in the 95th percentile for head size, though) lol! My daughter wants one too. shes 3 so ill be playing around with enlarging.. I absolutely love love love it. so cute, so easy. i will be making these for all the kids birthdays in my moms group i think.. thanks for sharing..!!
Photos as promised!
Side A: wavy stripes
http://www.flickr.com/photos/49047179@N03/4579374607/
Side B: green leaves
http://www.flickr.com/photos/49047179@N03/4580007952/
I'm not sure what I did wrong but it turned out way too small for my 15 month old's head. It is very cute though! I'll have to try it again…
FYI – I made another hat after increasing the pattern size to 120% and it almost fits MY head!! I'll use that size pattern for my 4 year old son and probably only increase the pattern to 110% for my 1 year old daughter.
I still love this project 🙂
thanks JMoose.. awesome. ill do that size for my tall 3 yr old..
I just made the hat for my nephew at 120% and it fits on my adult head (22" circumference) but is short and looks funny. Not sure if it will fit my nephews head (19.5" circumference) or not, I will have to send it to him and see.
I've blogged about it and attached photos here:
http://kenagy.blogspot.com/2010/05/1st-try-not-quite-right.html
OK – I made another and this time it came out great! I enlarged the pattern to 130%, and added an extra inch in length. (I continued the flared line out one inch longer and drew a straight line across the bottom) This worked perfectly!
I think making this hat when you have the head that it's going on right there is helpful. I will still send the other to my nephew to see if it fits.
I have blogged about it here:
http://kenagy.blogspot.com/2010/05/sun-hat.html
I made this hat yesterday and it was very cute and fast. I tried it on my friend's 14 month old who has very little hair and it was much too small! Apparently she has a large head. I am going to try it on my niece who is 7 months.
Okay, I did not give up. I increased the size by 125% and it is still just a teeny bit on the small side for my big-headed 16 month old, but it is still adorable:
http://babyvalone.blogspot.com/2010/05/khakis-turned.html
Is there any chance you can upload the pattern to google docs? Scribd is charging for it… And it's nearly summer in Argentina and Violeta still has no hair so she needs one of these! Thank you muchly
Thanks for the heads up Vic! I uploaded it to google docs and adjusted the post accordingly. you can find the pattern here: Prudent Baby Sun Cap
Yay! I just came back to check up on this – thanks so much! I've just finished a week of working round the clock on an editing job and I'm planning to wind down this weekend making a matching sunhat and the snappy top (and maybe some bloomers) for Violeta. Gracias gracias 🙂
Hi! thanks for sharing & guess what! I succeeded! I made my very first sunhat & it fits my 6 year-old daughter's head well… Thanks so much!
http://rosheyzcraftworld.blogspot.com/2010/12/reversible-sun-cap-aka-sun-hat.html
I love this pattern – but I think my technique is not right. I'm getting some overlapping fabric as I'm trying to sew the curves on the sides of the hat. Does anyone have tips or pointers as to how to sew this smoothly?
Thanks!
this is a bit small for my one-year-old. but I think that if I had done a smaller seam allowance it might've worked.
I made this according to the pattern… eliminated the second external stitch and it was still on the small side for my 1 year old daughter… her head circumference is at 55% on the national average. I will slightly enlarge this pattern and I think it will fit beautifully! Love this thank you so much!
I am not that computer savey but I couldn't figure out how to scale exactly I am supposed to scale it up to 110% for an 18 mo old and maybe 120% for a 3.5 year old. Help, I'm leaving on vacation in two days : )
[…] of it and the pattern is so basic. You can find this on the Prudent Baby website by clicking (here). have fun sewing Share this:TwitterFacebookLike this:LikeBe the first to like this. Posted in […]
This little hat is adorable! I liked it so much I posted it on my blog. Thanks for sharing Jamie http://forgetmenotcb.wordpress.com/2012/06/26/forties-inspired-sun-cap-pattern-with-free-pattern-2/
[…] 出典 http://prudentbaby.com […]
[…] più classici capelli a cloche. Se ne trovano di tutti i colori e su questo sito trovate persino il tutorial per crearne uno […]
[…] più classici capelli a cloche. Se ne trovano di tutti i colori e su questo sito trovate persino il tutorial per crearne uno […]
I really want to make this hat for my baby girl, but the pattern link isn’t working 🙁
I want to make this too, but the pattern isn’t working for me either!
[…] ★詳しい作り方 こちら ★型紙 こちら […]