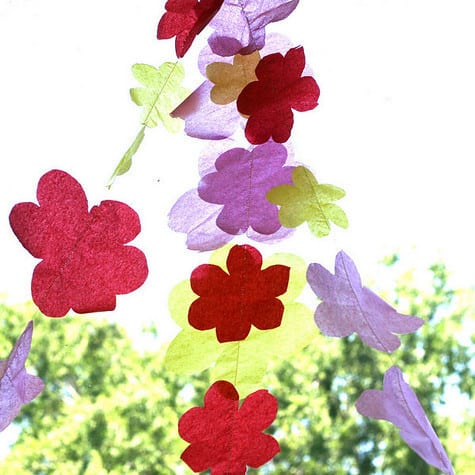
This Page

has been moved to new address

DIY Tissue Garland

Sorry for inconvenience...

Redirection provided by Blogger to WordPress Migration Service
body { background:#fff url("http://www.blogblog.com/dots/bg_dots.gif") 50% 0; margin:0; padding:0 10px; text-align:center; font:x-small Verdana,Arial,Sans-serif; color:#333; font-size/* */:/**/small; font-size: /**/small; } /* Page Structure ----------------------------------------------- */ @media all { #content { background:url("http://www.blogblog.com/dots/bg_3dots.gif") no-repeat 250px 50px; width:700px; margin:0 auto; padding:50px 0; text-align:left; } #main { width:450px; float:right; padding:50px 0 20px; font-size:85%; } #main2 { background:url("http://www.blogblog.com/dots/bg_dots2.gif") -100px -100px; padding:20px 10px 15px; } #sidebar { width:200px; float:left; font-size:85%; padding-bottom:20px; } #sidebar2 { background:url("http://www.blogblog.com/dots/bg_dots2.gif") 150px -50px; padding:5px 10px 15px; width:200px; width/* */:/**/180px; width: /**/180px; } } @media handheld { #content { width:90%; } #main { width:100%; float:none; } #sidebar { width:100%; float:none; } #sidebar2 { width:100%; } } html>body #main, html>body #sidebar { /* We only give this fade from white to nothing to browsers that can handle 24-bit transparent PNGs */ background/* */:/**/url("http://www.blogblog.com/dots/bg_white_fade.png") repeat-x left bottom; } /* Title & Description ----------------------------------------------- */ @media all { #blog-title { margin:0 0 .5em; font:250%/1.4em Georgia,Serif; color:#353; } #blog-title a { color:#353; text-decoration:none; } #description { margin:0 0 1.75em; color:#996; } #blog-mobile-title { display:none; } #description-mobile { display:none; } } @media handheld { #blog-title { display:none; } #description { display:none; } #blog-mobile-title { display:block; margin:0 0 .5em; font:250%/1.4em Georgia,Serif; color:#353; } #blog-mobile-title a { color:#353; text-decoration:none; } #description-mobile { display:block; margin:0 0 1.75em; color:#996; } } /* Links ----------------------------------------------- */ a:link { color:#488; } a:visited { color:#885; } a:hover { color:#000; } a img { border-width:0; } /* Posts ----------------------------------------------- */ .date-header { margin:0 0 .75em; padding-bottom:.35em; border-bottom:1px dotted #9b9; font:95%/1.4em Georgia,Serif; text-transform:uppercase; letter-spacing:.3em; color:#663; } .post { margin:0 0 2.5em; line-height:1.6em; } .post-title { margin:.25em 0; font:bold 130%/1.4em Georgia,Serif; color:#333; } .post-title a, .post-title strong { background:url("http://www.blogblog.com/dots/bg_post_title.gif") no-repeat 0 .25em; display:block; color:#333; text-decoration:none; padding:0 0 1px 45px; } .post-title a:hover { color:#000; } .post p { margin:0 0 .75em; } p.post-footer { margin:0; text-align:right; } p.post-footer em { display:block; float:left; text-align:left; font-style:normal; color:#996; } a.comment-link { /* IE5.0/Win doesn't apply padding to inline elements, so we hide these two declarations from it */ background/* */:/**/url("http://www.blogblog.com/dots/icon_comment.gif") no-repeat 0 .25em; padding-left:15px; } html>body a.comment-link { /* Respecified, for IE5/Mac's benefit */ background:url("http://www.blogblog.com/dots/icon_comment.gif") no-repeat 0 .25em; padding-left:15px; } .post img { margin:0 0 5px 0; padding:4px; border:1px solid #cca; } /* Comments ----------------------------------------------- */ #comments { margin:0; } #comments h4 { margin:0 0 10px; border-top:1px dotted #9b9; padding-top:.5em; font:bold 110%/1.4em Georgia,Serif; color:#333; } #comments-block { line-height:1.6em; } .comment-poster { background:url("http://www.blogblog.com/dots/icon_comment.gif") no-repeat 2px .35em; margin:.5em 0 0; padding:0 0 0 20px; font-weight:bold; } .comment-body { margin:0; padding:0 0 0 20px; } .comment-body p { margin:0 0 .5em; } .comment-timestamp { margin:0 0 .5em; padding:0 0 .75em 20px; color:#996; } .comment-timestamp a:link { color:#996; } .deleted-comment { font-style:italic; color:gray; } .paging-control-container { float: right; margin: 0px 6px 0px 0px; font-size: 80%; } .unneeded-paging-control { visibility: hidden; } /* More Sidebar Content ----------------------------------------------- */ .sidebar-title { margin:2em 0 .75em; padding-bottom:.35em; border-bottom:1px dotted #9b9; font:95%/1.4em Georgia,Serif; text-transform:uppercase; letter-spacing:.3em; color:#663; } #sidebar p { margin:0 0 .75em; line-height:1.6em; } #sidebar ul { margin:.5em 0 1em; padding:0 0px; list-style:none; line-height:1.5em; } #sidebar ul li { background:url("http://www.blogblog.com/dots/bullet.gif") no-repeat 3px .45em; margin:0; padding:0 0 5px 15px; } #sidebar p { margin:0 0 .6em; } /* Profile ----------------------------------------------- */ .profile-datablock { margin:0 0 1em; } .profile-img { display:inline; } .profile-img img { float:left; margin:0 8px 5px 0; border:4px solid #cc9; } .profile-data { margin:0; line-height:1.5em; } .profile-data strong { display:block; } .profile-textblock { clear:left; } /* Footer ----------------------------------------------- */ #footer { clear:both; padding:15px 0 0; } #footer hr { display:none; } #footer p { margin:0; } /* Feeds ----------------------------------------------- */ #blogfeeds { } #postfeeds { padding-left: 20px }

Prudent Baby

Get sewing how to, sewing tutorials, and sewing help to learn sewing. We offer sewing tutorial for sewing moms.

Tuesday, June 8, 2010

DIY Tissue Garland


Y'all, this might be the best... fastest, cheapest, eye-pleasing-est party decorating trick ever. You can literally make this Tissue Garland that I made for Clare's Buggie Birthday an hour before your party starts when, eh-hem, you should be showering.

Click here to get the so easy DIY for Tissue Garland.

DIY Tissue Garland

These directions are for the flower garland that I made but you could easily make squares, circles or pennants... any shape really! Ooooh snowflakes!

1. Grab a few sheets of tissue in party coordinating colors.  I used about 6 sheets to create 4 - 6' strands


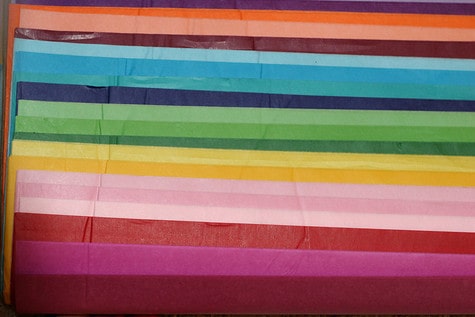
2. Fold a few sheets up until the short width is the width of your large flower (mine were about 5") and then cut off the extra. Cut through the folds on all sides so you have a stack of squares.


3. The extra becomes your smaller flower. Cut it square. Cut through the folds on all sides so you have a stack of squares.


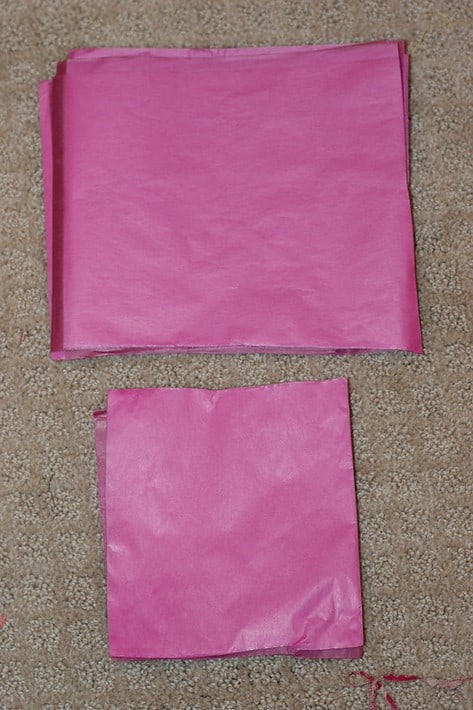
4. Take a few squares (depending on scissor performance) and fold them in half. Then fold them in thirds to a point on the folded side (like a sliced pie)
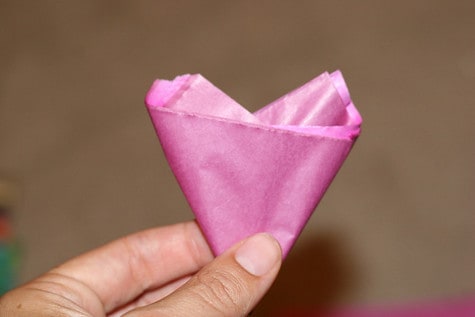
mmmm pie.

5. Cutting through all layers at once, cut the top into the rounded curve of one petal.


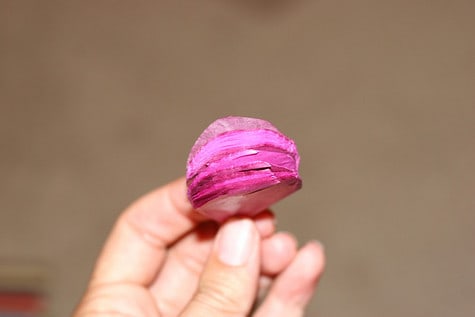
6. Unfold and you have a flower (hopefully.)


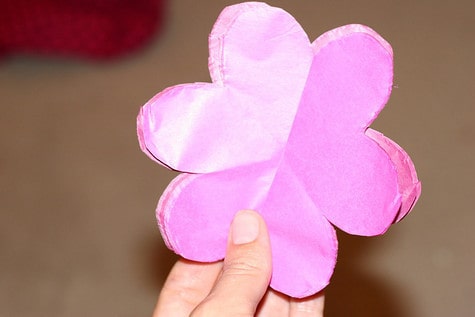
7. Repeat with the rest of your tissue squares.

8. Arrange your stacks of flowers by color and size next to your sewing machine.

9.And start sewing! Just place one flower into your machine and start and as that flower finishes slip another flower in. You can leave a bit of space between or overlap the flowers. I will overlapped even more next time. Perhaps even sew through multiple layers at the same time and fold them to create 3-D flowers.


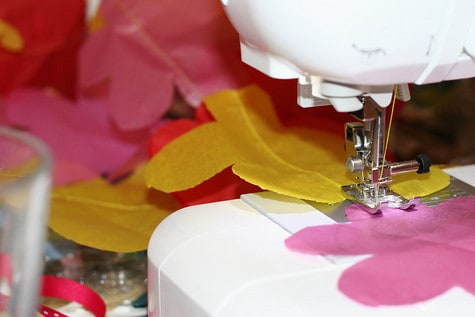
Note: My machine did best on a standard stitch length (2.5), when I tried a (5) it started to bunch. If you are having trouble with bunching, you can pull the tissue from the back of your machine (gently) and it should stay smooth.

The strands are so light that you can easily hang with tape. They look great on windows!

This was so fast and easy and it added alot to the party!

Labels: , , , , , , ,

21 Comments:

Blogger Tina said...

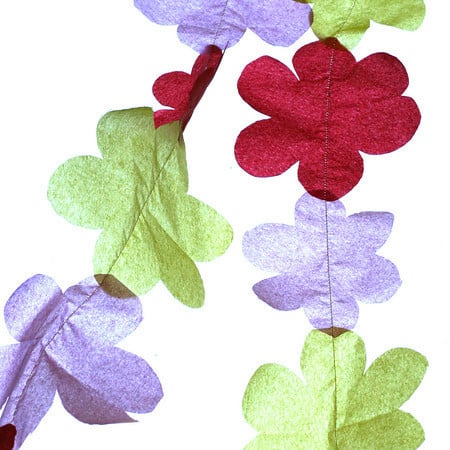
great idea with big impact.

June 8, 2010 1:59 PM  
Blogger Jaime said...

soooo pretty!

June 8, 2010 4:05 PM  
Blogger Susan @ Entertain Exchange said...

Looks very pretty and easy to make!

June 8, 2010 7:40 PM  
Blogger Stacie Weston said...

This comment has been removed by the author.

June 8, 2010 8:56 PM  
Blogger Stacie Weston said...

Very pretty! Thanks for the tutorial. I hung fabric on one wall of my daughter's bedroom and have been at a loss as to how to hide the seams/staples. I will use this idea to cut out felt flowers (one at a time, of course)! What a time saver. Thanks again!

June 8, 2010 8:57 PM  
Blogger Country Girl in the City said...

These are so pretty! I am going to keep this in mind for my daughter's birthday in August.

Thanks for the tutorial!

June 9, 2010 7:30 AM  
Blogger Melissa said...

Seriously adorable!! Thanks!!
Melissa
http://www.houseography.net

June 9, 2010 9:13 AM  
Blogger Elz said...

Great idea. My little one is having a fairy garden party; this will make a huge impact! Thanks.

June 9, 2010 1:06 PM  
OpenID chetchez said...

http://hyperboleandahalf.blogspot.com/2010/04/alot-is-better-than-you-at-everything.html

June 9, 2010 4:07 PM  
Blogger Heather Jane said...

perfect for our Hawaiian luau next week!

June 10, 2010 11:37 AM  
Blogger lisalyn said...

I'm a HUGE fan of garland and this is no exception!! :)

June 20, 2010 5:58 PM  
Blogger Mid-Craft Crisis said...

I love this idea. Actually, I love all the ideas from the Buggie Bash. Our daughter turns 3 in September and she has always loved spiders and moths (!?). I will be using some of these ideas. Thanks.

June 26, 2010 4:46 PM  
Blogger Jennie said...

This comment has been removed by the author.

July 15, 2010 12:03 PM  
Blogger Jennie said...

ETA: woops, put the wrong link in!

Thank you so much for this tutorial! I used it to make a butterfly garland for my daughter's Fairy party! (here: http://tuffetblog.blogspot.com/2010/07/costume-party.html ) The kids really liked the fluttery butterflies and I really liked how easy and, ahem, inexpensive it was! Made a huge impact for not a lot of pennies! Thank you so much!

July 15, 2010 12:05 PM  
Blogger Mrs. J said...

Thanks so much for this tutorial!
http://i1039.photobucket.com/albums/a480/MrsJ0430/IMG_8112.jpg
Our kiddo celebrated her 2nd Birthday and loves the WonderPets. We had a little party for her friends and their parents. Mr. J doesn't like everything so coordinated and matchy-matchy, so this garland was festive without say, "Hi! We bought out all the licensed stuff at the Party Store!" Hurrah!

September 21, 2010 8:11 PM  
Blogger Aimee said...

These garlands look so fun (& inexpensive)! I featured you here. So clever!

September 26, 2010 10:43 PM  
OpenID vegetariansalmon said...

Thanks so much, I am definitely using this for our upcoming first birthday party. My daughter's birthday is the Spring Equinox, so it works with the Spring theme!

January 23, 2011 4:52 PM  
Blogger Ordinarylife said...

I have made these for my daughters party tomorrow - thanks. It was really easy and they look great!

February 18, 2011 1:06 AM  
Blogger Amy Kirchhoff said...

Okay...So I'm trying to make these right now, and I'm having problems. I feel like a dork. I'm not getting a flower when I cut...Just a circle. What am I doing wrong? Perhaps I'm not understand the fold in thirds part.

p.s. I got your book for Christmas was just able to read it last week. Beautiful. :)

April 29, 2011 2:39 PM  
Blogger Jacinda said...

Hi Amy! You probably just need to cut more of a curve. Like a single petal. Deeper down on the sides. good luck!

May 2, 2011 8:58 AM  
Blogger Powlenuh S. said...

So so pretty thanks so much for the tutorial! It took me a couple of tries to get the flowers to come out just right but I finally got it!

September 7, 2011 1:27 PM  

Post a Comment

Subscribe to Post Comments [Atom]

<< Home