


While working on My New Backyard project, I decided that sewing tons of pillows and cushions was key to keeping it all feeling like an outdoor room and being comfortable while lounging about.
I wanted contrasts of different textures, and I knew piping and trim would help tie the colors and feels together, so I made several different styles of piped pillows. Because these cozy poufs would be living outside, I also knew that being able to easily wash them was key to their longevity, so I used zippers to make sure the covers were removable.
We showed you how to sew basic zipper pillows (with hidden zippers) and how to sew zipper pillows with sham edges, but I’ve never run you through sewing a zipper pillow with piped edges.
So let me show you How to Sew Zipper Pillows with Piping after the jump…
How to Sew Zipper Pillows with Piping
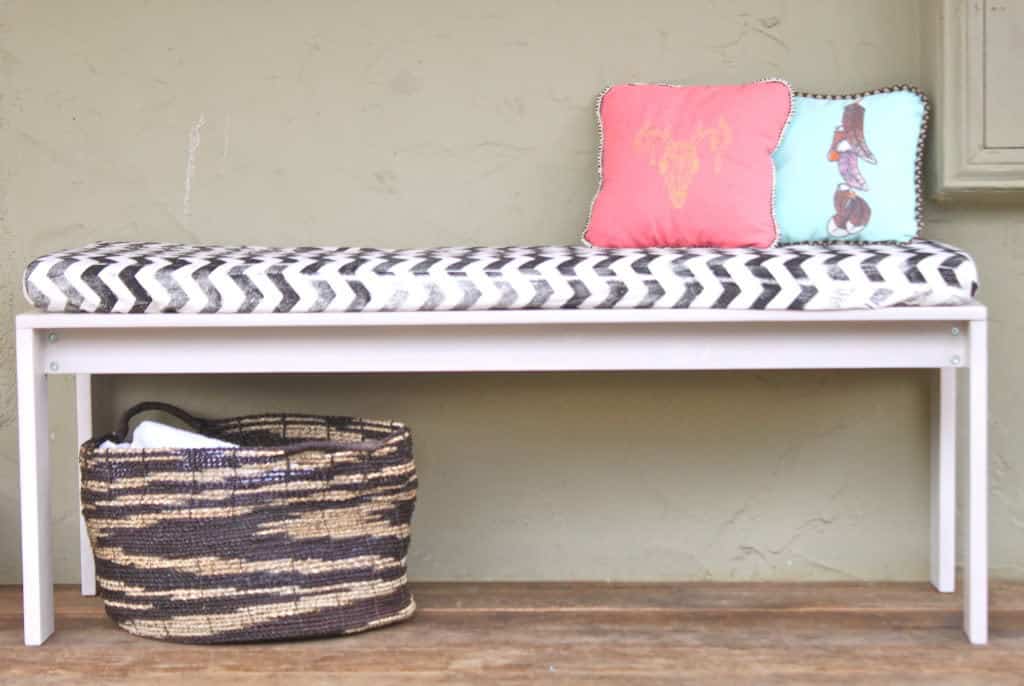
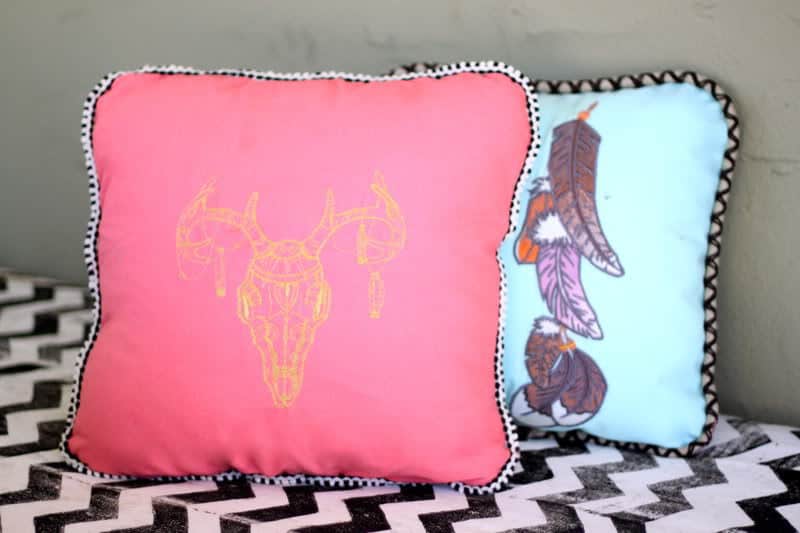
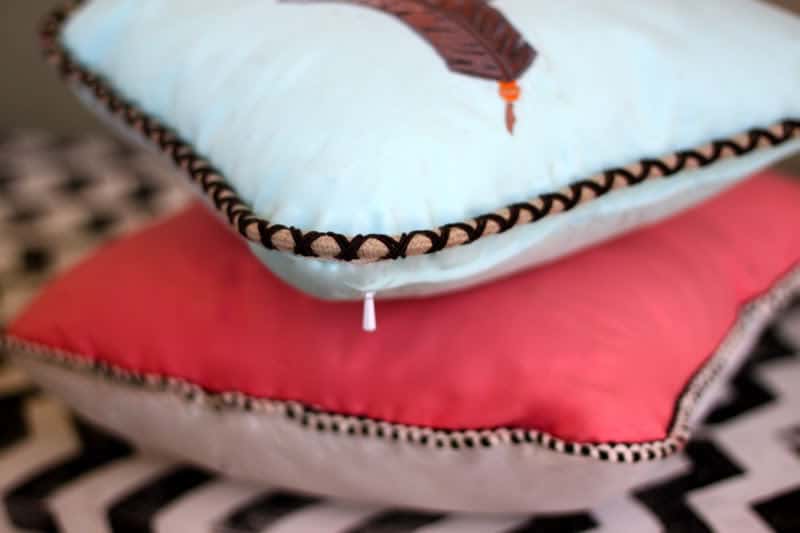
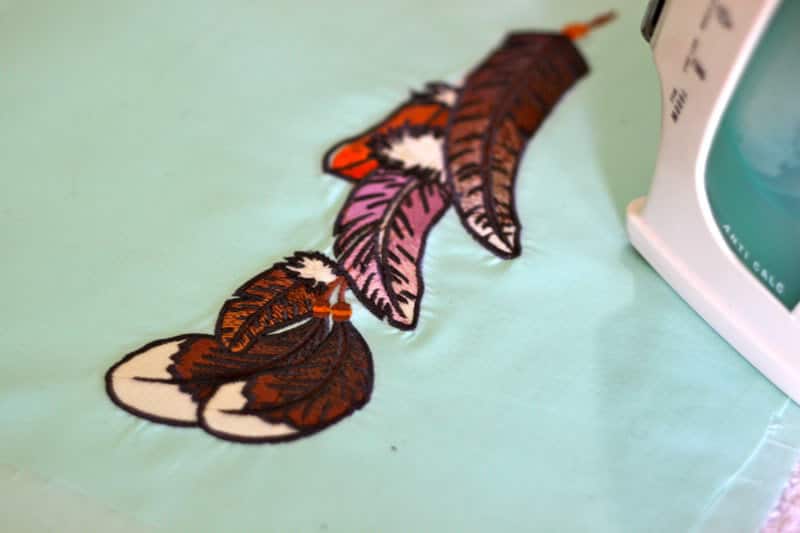
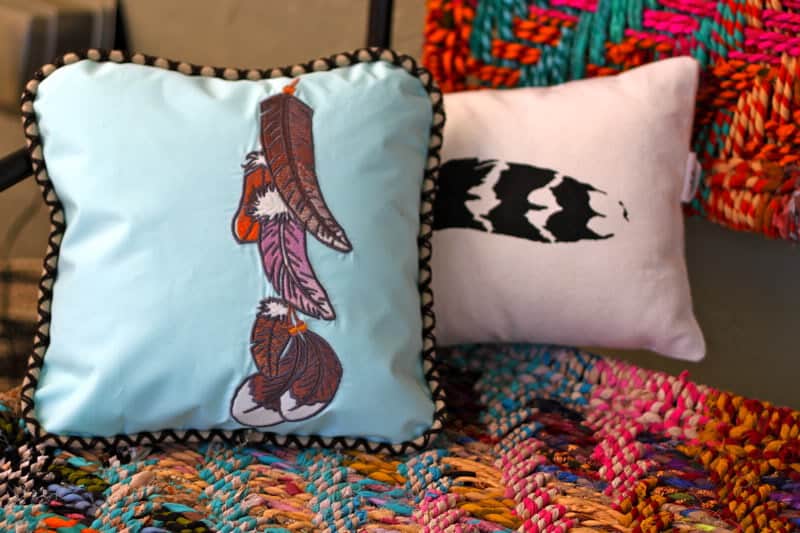
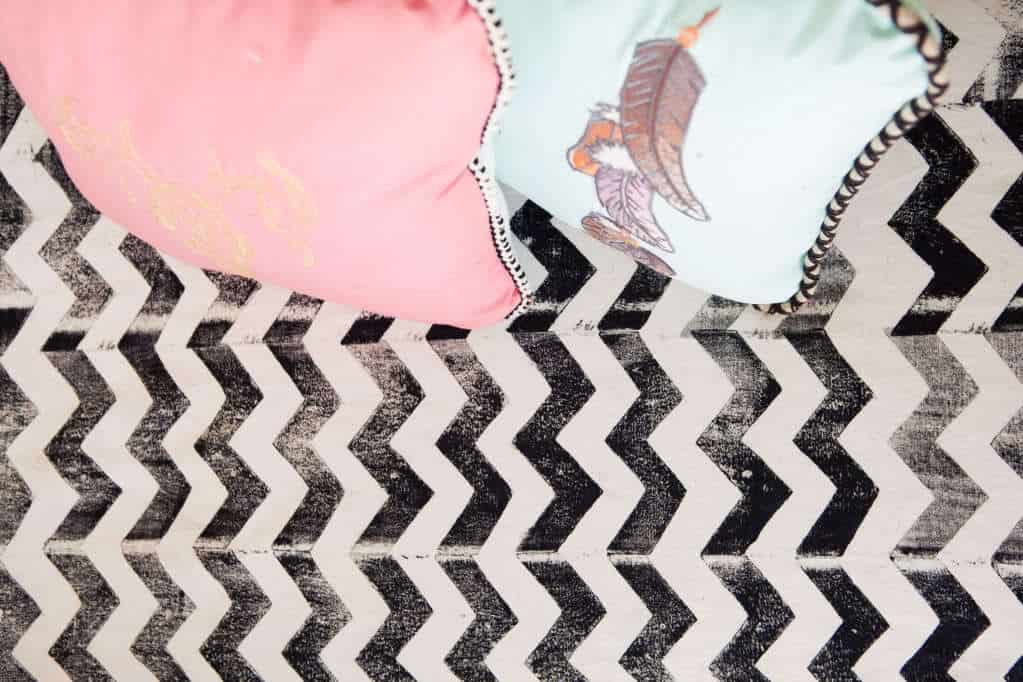
First I embroidered some designs on my pillows. Of course, not required, but it is super fun :). The big pillows have stripes of gold and silver metallic thread with black and white chevron-pattern trim. The small blue pillow has a leather-wrapped rope trim and feather design, while the coral colored pillow had a gold metallic deer skull with a vintage crochet trim in natural and black. The same tute applies to all pillows…
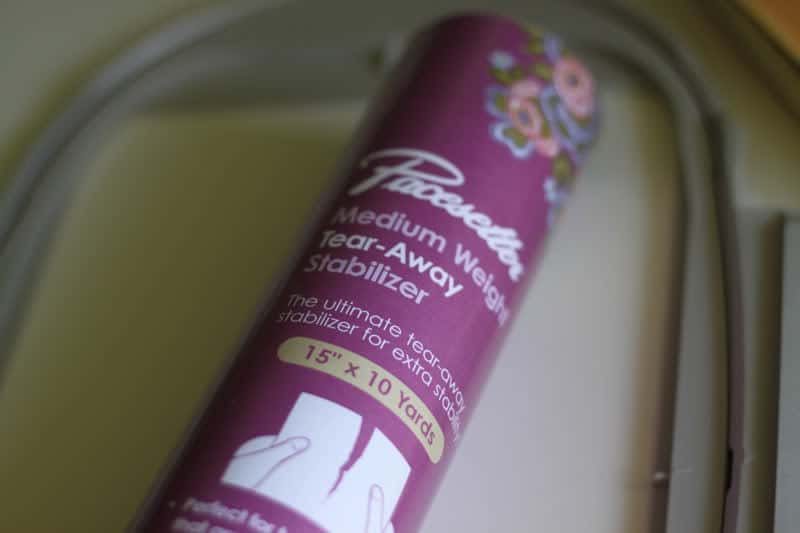
First, for the embroidery-lovers, I’ll just quickly tell you about that aspect. I used medium weight tear-away stabilizer (love the Pacesetter stabilizers).
And some designs from Urban Threads. I used this feather design, and while the design was lovely, my skills were not quite enough to prevent all puckering. I need to keep practicing. I had much more luck with the Deer Skull design, and I used metallic thread for it, which just made my day.
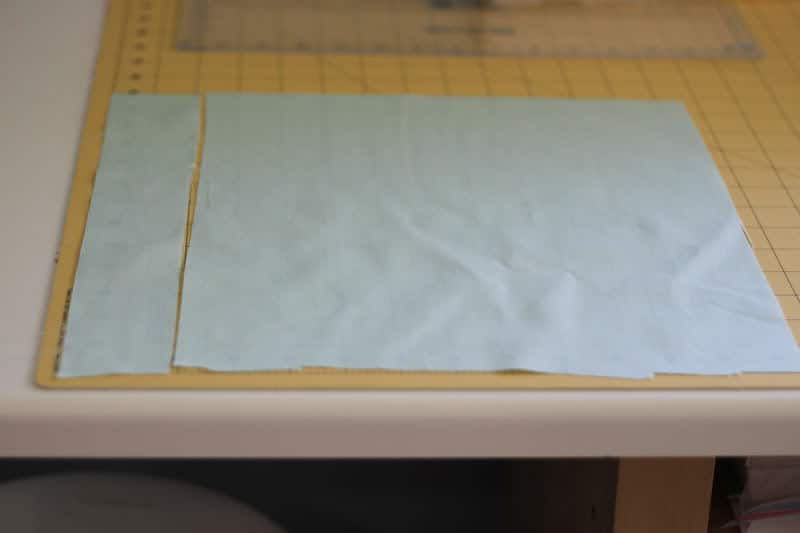
So I cut my embroidered fabric for the pillow front to size for my pillow. If you prefer a pillow of normal stuffed-ness, then you would cut it one inch bigger than your final pillow dimensions. I wanted these small pillows to feel overstuffed, so I actually cut my fabric to the exact pillow dimensions, a 12″ square.
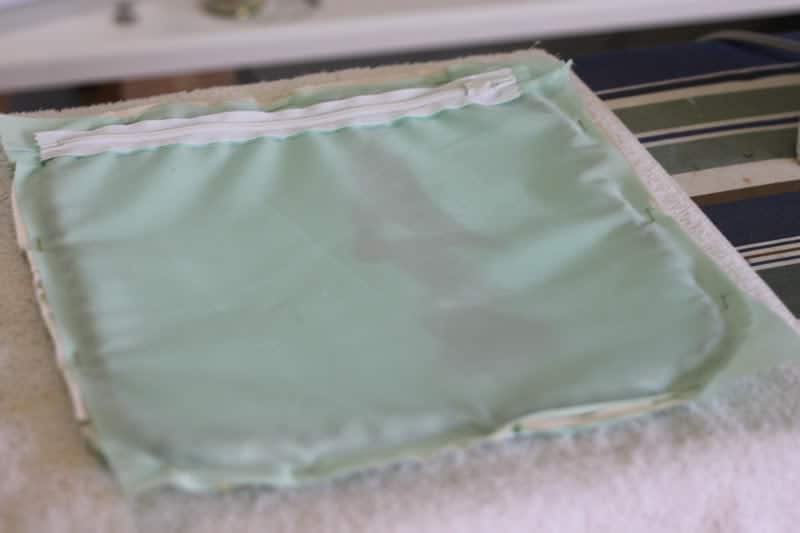
Now for the back of the pillow we are going to cut a piece of fabric that is one inch longer on one side, so we have room to add our zipper. So I cut a piece of fabric 12″X13″. Then 2″ from the edge (on the 13″ side) Cut a straight line. So now you have a piece of fabric 2″X12″, and a piece 11″X12″.
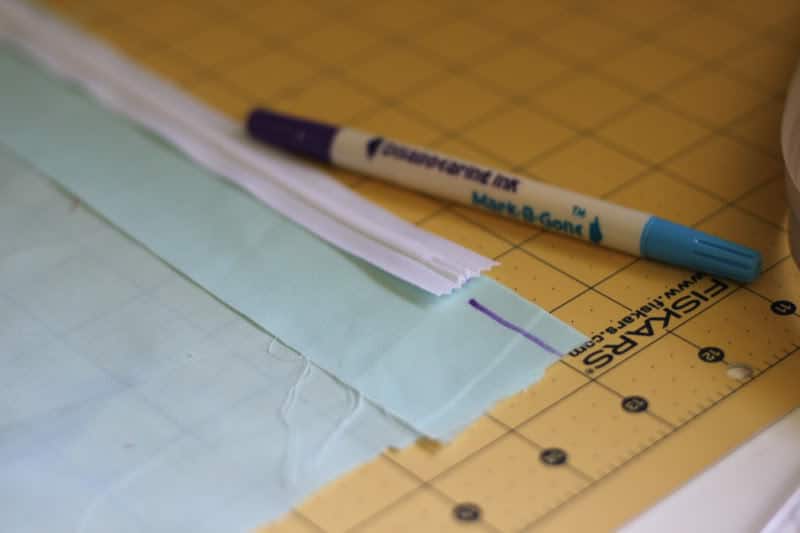
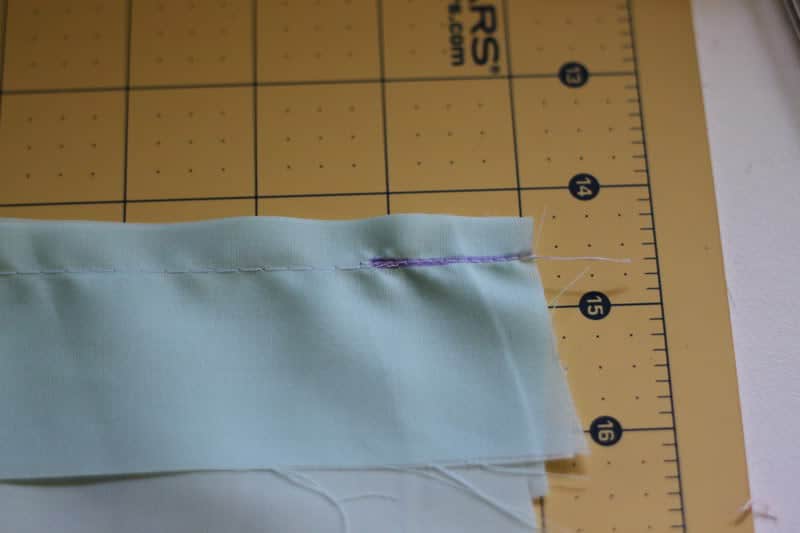
For a super finished pillow, you could serge the 12″ edges before attaching your zipper, but I was in a hurry. Turn the larger piece right side up, then lay the thin piece right side down with 12″ sides aligned, so right sides are facing. Choose a zipper that is a few inches shorter (I used a 10″ zipper) and lay it down, centered, aligned with the edge of the fabric. Draw a line from the edge of the zipper to the edge of the pillow, 1/2″ down from the top edge, on each side of the zipper.
Sew along the line you drew with a straight stitch. Then baste across the top between the two lines. Basting is sewing with a straight stitch and the widest width your machine will allow, usually a five.
Now open up the seam and iron it flat:
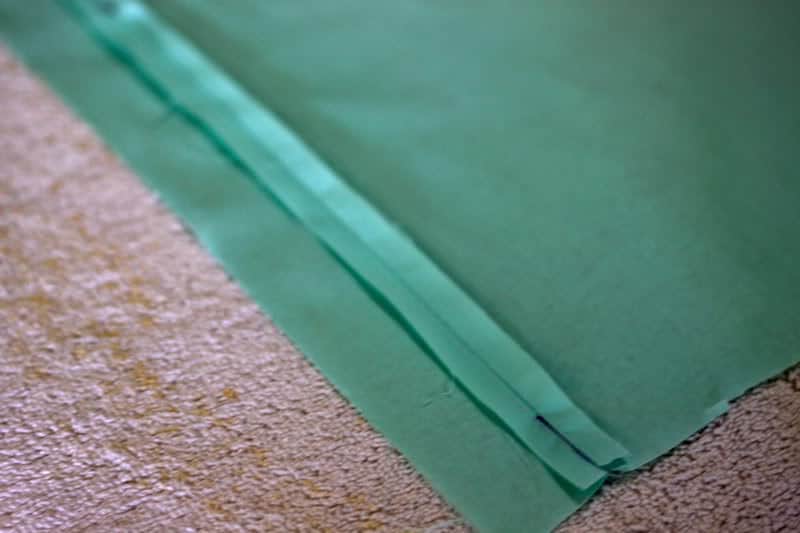
Lay your zipper face down on the seam and pin in place.
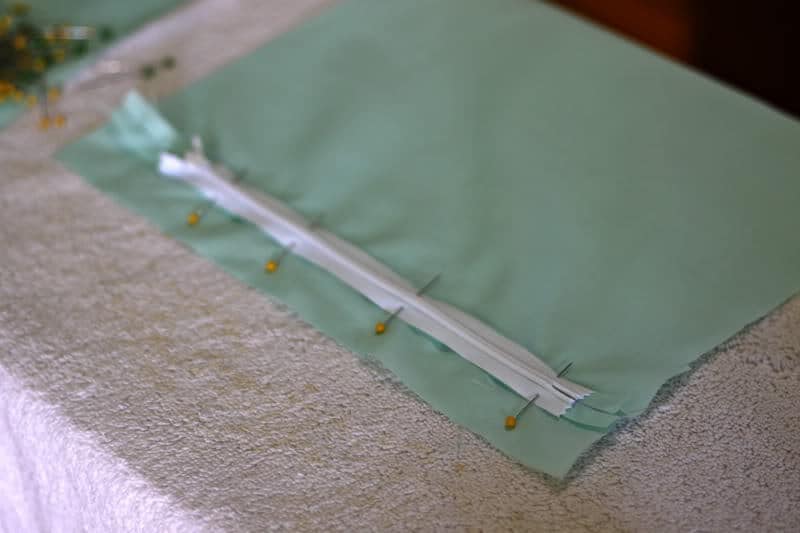
Use your zipper foot to sew along each side of the zipper with a straight stitch.
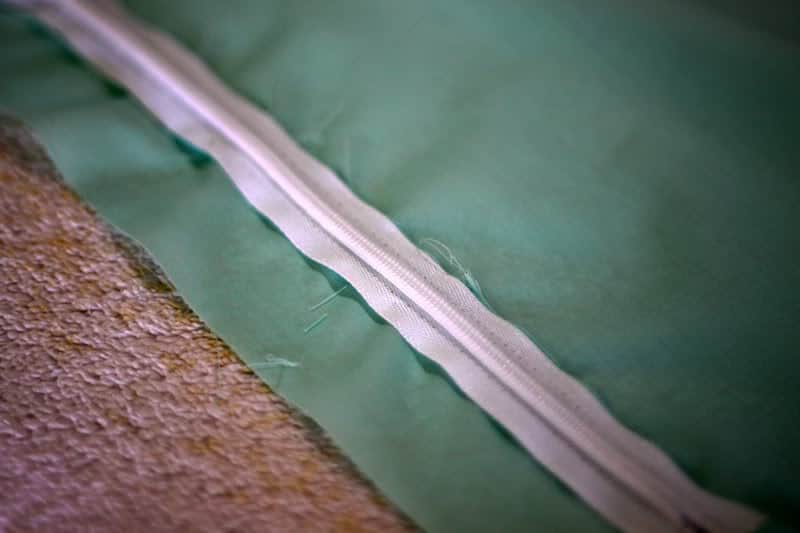
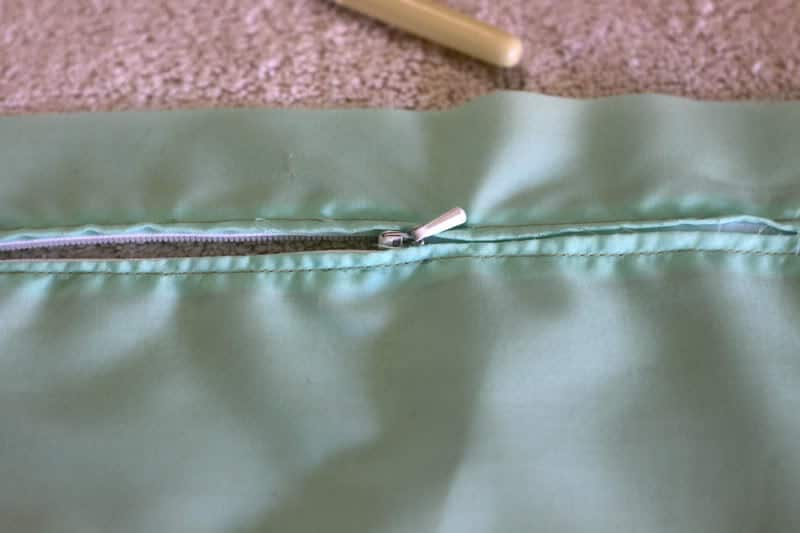
Turn the piece over, and use your seam ripper to rip the basting stitches.
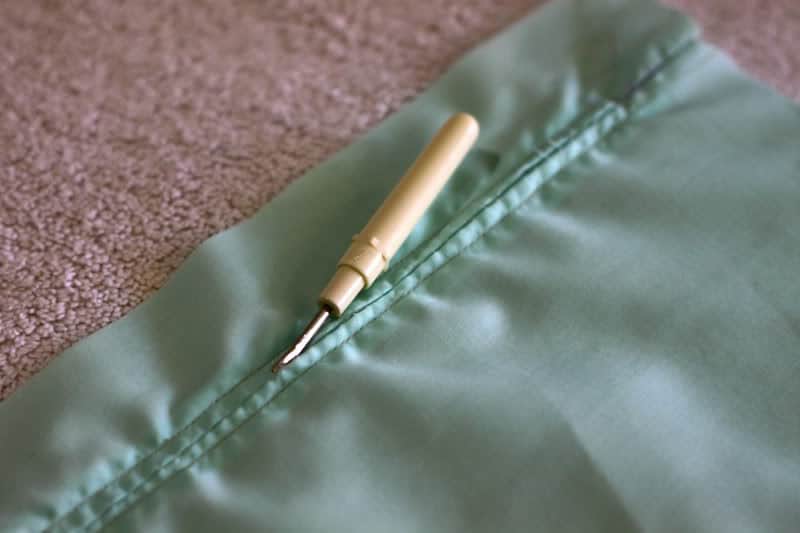
Underneath, your zipper is revealed. Unzip it halfway.
Now back to your pillow front. Take your piping or trim and pin it around the edge, with the piping the the inside. If it has a right side, make sure the right side is facing down.
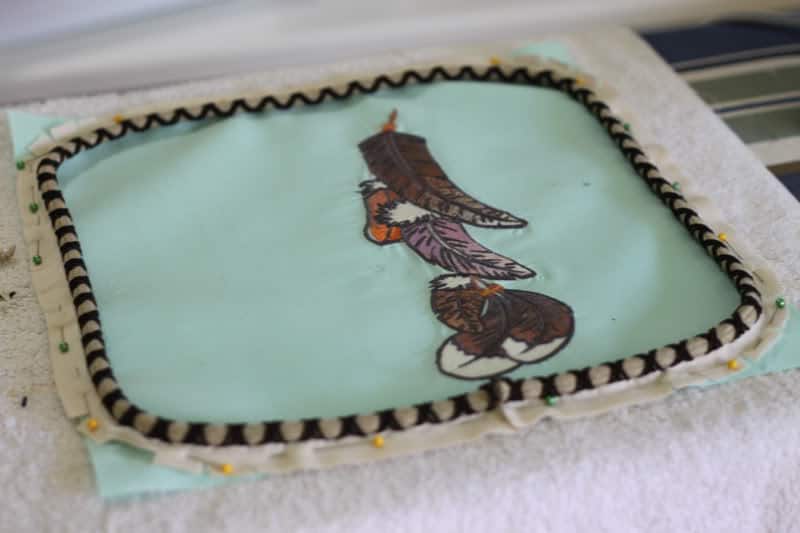
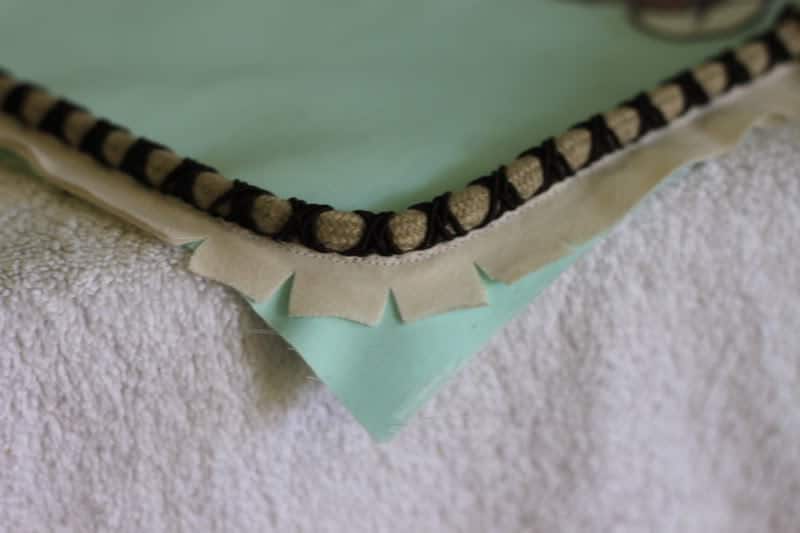
Clip the edges to round the corners.
Where the edges meet, if you are using traditional piping, you can open it up, cut the cord, and align the cords to meet, then wrap the piping back up around the cord. I was using a rope trim so I cut it to meet exactly.
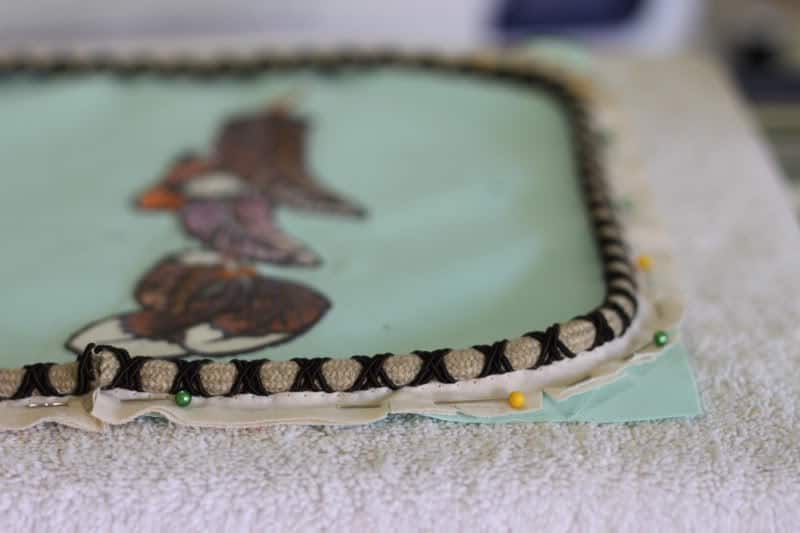
Now baste in place using your zipper foot (or a piping foot if you have one).
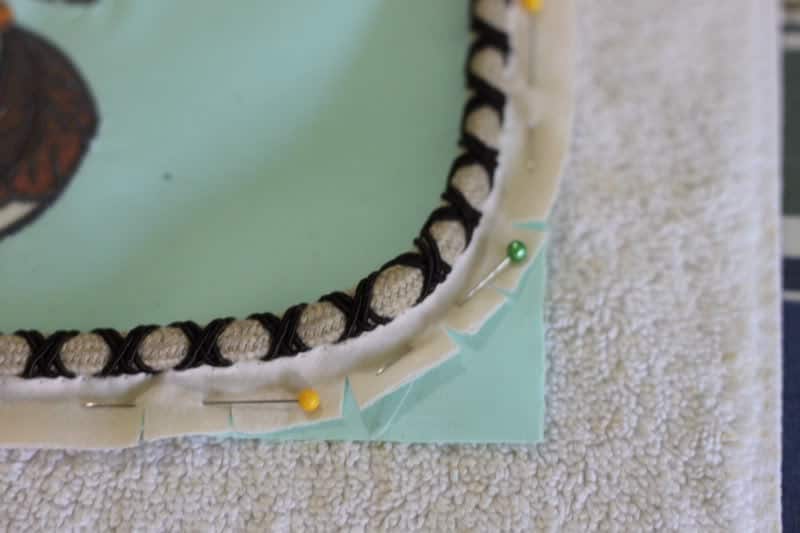
Now lay your pillow front right side up, with your pillow backing right side down on top, and pin in place all the way around.
You’ll want to make sure the pins are on the front side of your pillow, not the side with the zipper, so you can either pin that way to begin with, or if it is easier for you, pin from the back then switch them around to the front.
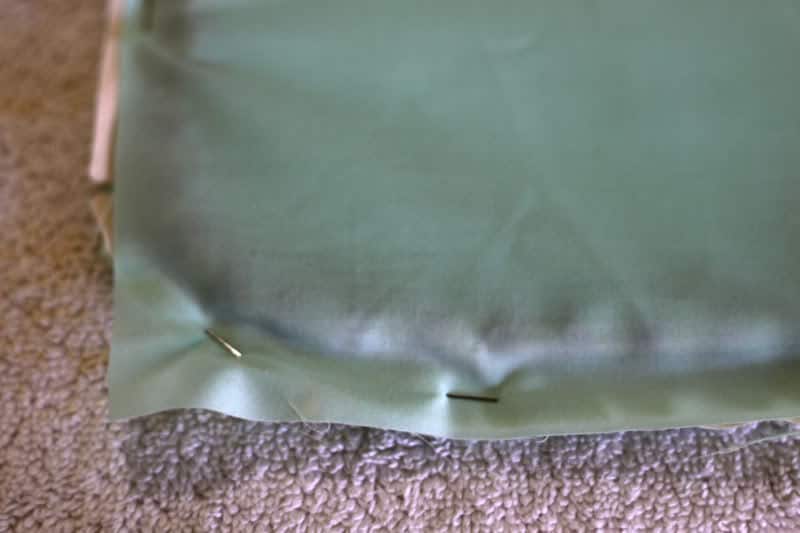
The reason for this is so you can see your basting line from where you attached the piping as you sew the two sides of the pillow together.
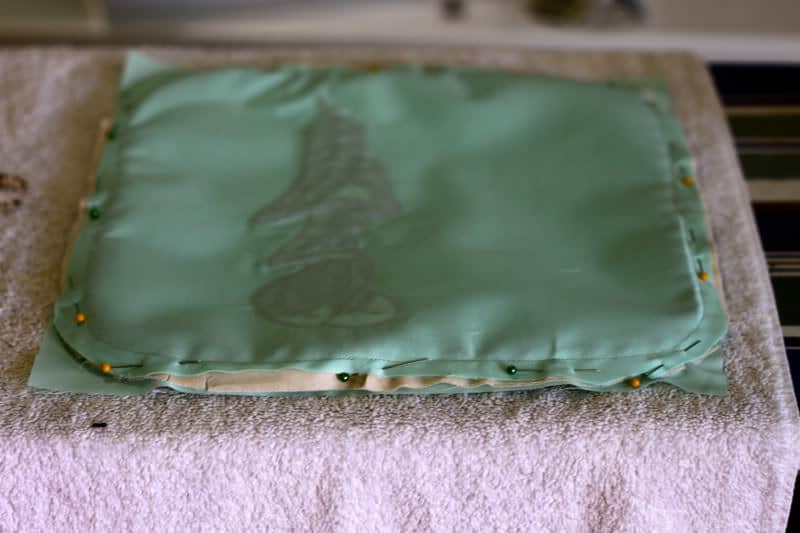
You want to sew the two sides together just inside the previous line of stitches.
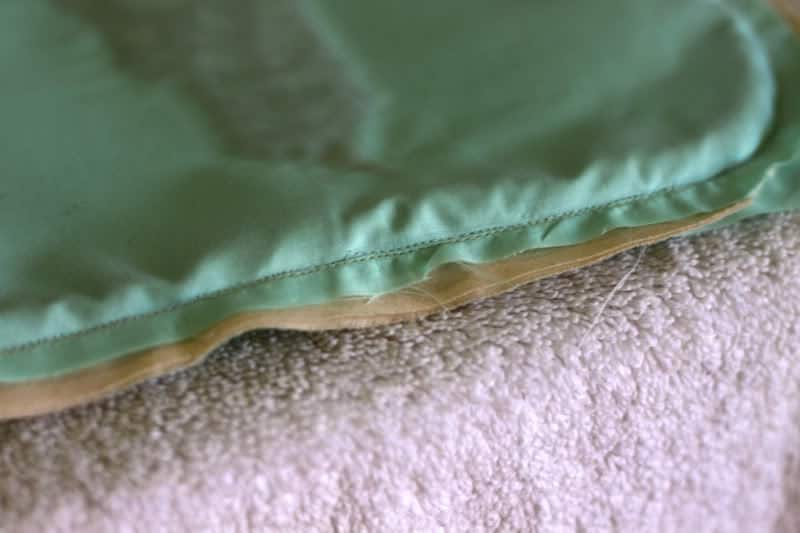
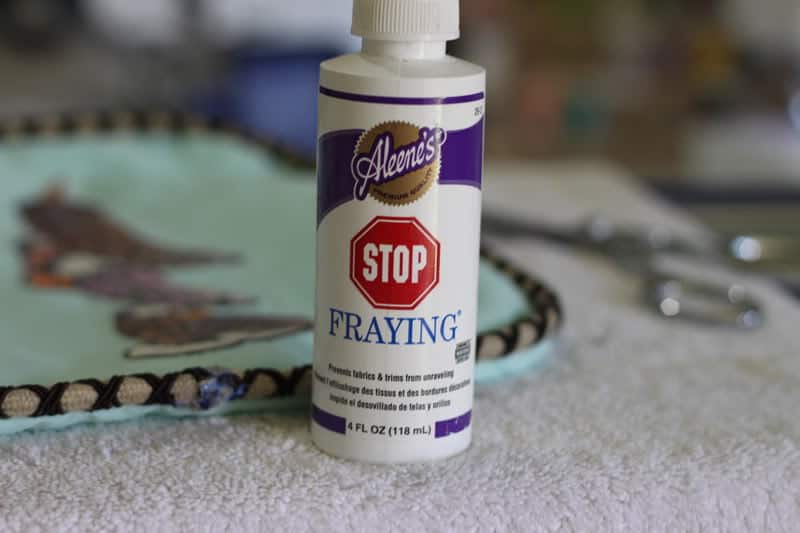
Trim your edges, then turn your pillow inside out. One more step for me, I used some stop fray at the point where the two rope edges meet.
Done!
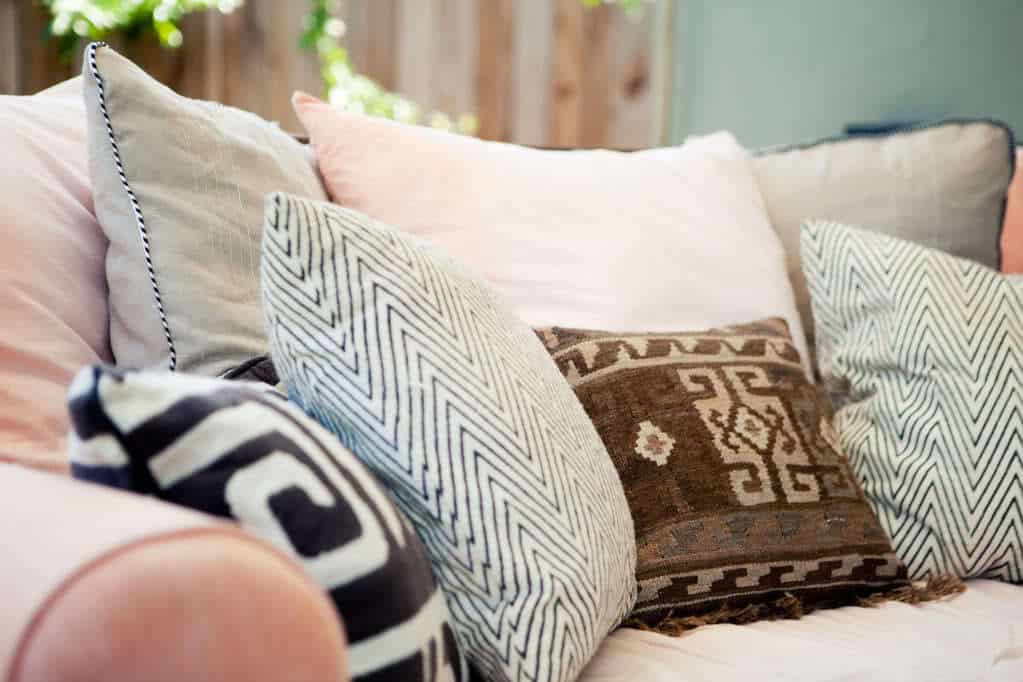
I made a bunch of different pillows using this method, including these:
And the large daybed pillows.
I hope you enjoy sewing pillows, obviously, I do 😉
They are all beautiful! So inspiring.
I don't know what you are talking about with the puckering on the feather pillows. Those are my absolute favorite. I <3 them so bad that I now want an embroidery machine to make them myself.
Thank you so much for the tutorial! I am making 6 new pillows for my great room. I wanted to include zippers but didn't find any tutorials that made sense. Too bad I already made two. The others are sure to have zippers though. Thanks again!
I keep thinking that pink pillow has a women's reproductive system on it. I'm wrong right? Now that I have it in my head that those are fallopian tubes and a uterus, etc, I cannot NOT see it.
ah Krista… it looks like a classic Animal skull to me;) I love these! I am so going with this to make pillows to match my daughters room! THANKS SO MUCH FOR ALL Y"ALL DO:)
OH! This post is just in time. I have just finished sewing up a pillow cover (the top part) for my mother and was still trying to work out how to do a zippered backing and add piping also! This is just what I needed! Thanks for the tutorial; even thought it's not that difficult, it will get me going much faster!
WOW.
Again I can only say, how much much much I love everything that you've created for this big project.
Thank you for sharing it.
I will totally try this tutorial.
Hopefully I can find such a smashing beautiful piping like the one that you'd used for these pillows. ….or are the pipings also handmade…..??
To be honest, the only reason I clicked on this post was to take a closer look at the blue pillow (because sewing a zipper pillow with piping is way too advanced for me!). In the top picture, it looks like there is a silhouette of a brown haired girl in some kind of seductive pose. I was just so shocked that I had to take a closer look. Come to find out, it's only feathers. 🙂 I had to laugh when I read the comment about the woman's reproductive system on the pink pillow.
I just wanted to take a moment to thank you for your great tutorials. I have used this tutorial and your other zipper tutorial numerous times. You've taken the intimidation out of the zipper! I am a decorative pillow wiz now! When I tried your nap mat tutorial, I didn't have as much success (my fault, not yours). Instead of giving up when it didn't turn out how I wanted, I made a cover for it–with a zipper of course! Thank you!
These are such clear and simple instructions. The photos illustrate your project very effectively. I really appreciate that you created this posting.
After doing a terrible job I started to look for explanations and yours is the best. You explain it so well and the pictures are so clear. It’s incredible!
Thanks a lot!
thank you!
Love this.
These pillows look really beautiful. A nice and a fully detailed article.
hvis du leder efter bedste frisør Frederiksberg så er salon elisa en af de bedste med ekspert team. Vi forsøger altid for bedste service til gode priser.
Web Health Mart is the World Famous Pharmacy company you interested buy any product of related Pharmacy like SOMA (carisoprodol) SOMA 500MG, Cialis, tramadol-100-mg Tablets etc.
Sunbedbooster is a safe online generic tablets pharmacy. Best top quality generic medicines guarantee without prescription in affordable price and daily discount coupon online.
Nice Post. Stay away from sleep with Armodafinil